
It was the time of November end in 2022 when I received a message from an Event Company. That guy said that he wants to make a Nutcracker. That was the first time I heard that word.
At first, I thought someone just wants to 3d print an object to crack nuts. My reply to that would have been ‘Not a good idea’. However, this guy wants serious business so we talked.
So we started this exciting project and I will show you how we made 2 nutcracker sculptures from scratch using different technologies like CNC, Lathe, 3D Printing, and LED lights.
Step 1: Manufacturing Strategy
If you are gonna make 2m tall sculptures in just 2 weeks then we definitely cannot rely on 3d printing and required a more quicker and cost-effective approach. Hence, I decided that most of the parts need to be made from CNC & Lathe machines using MDF wood material.
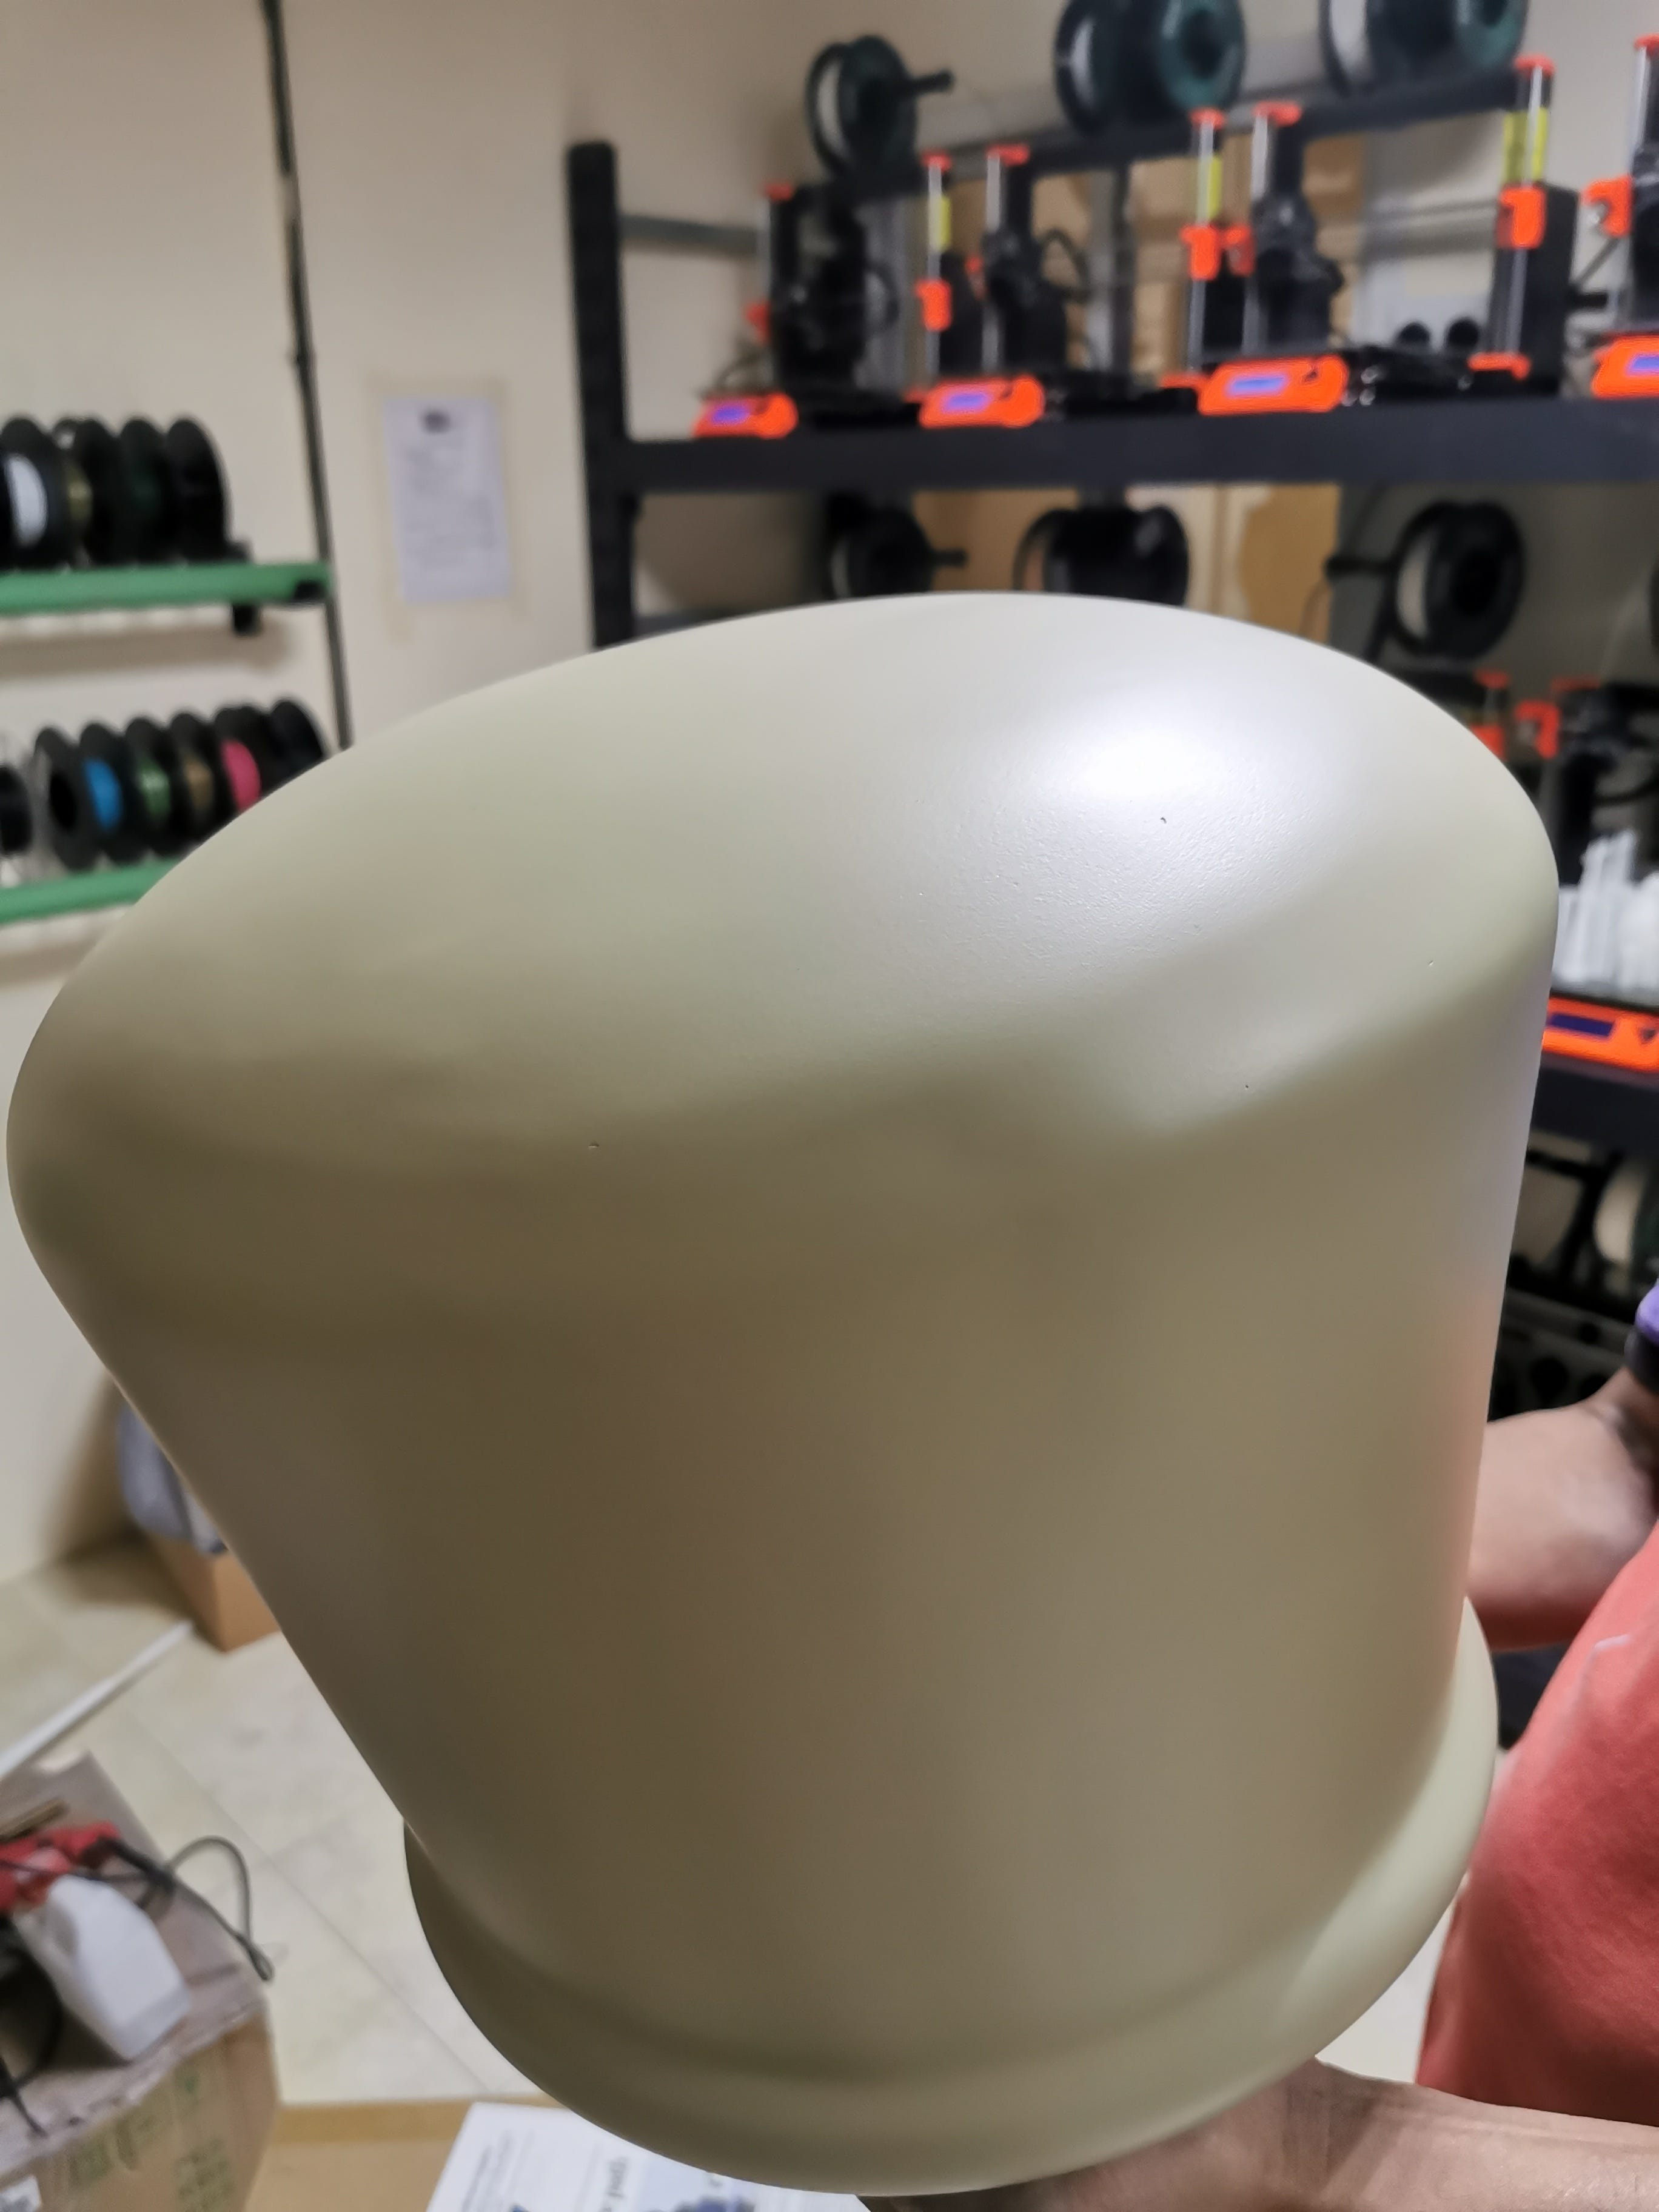
Parts like legs, toes, waist, body & head are made from the Lathe machine process. While some of the parts which we 3d printed are Arms, Drum & Cap.
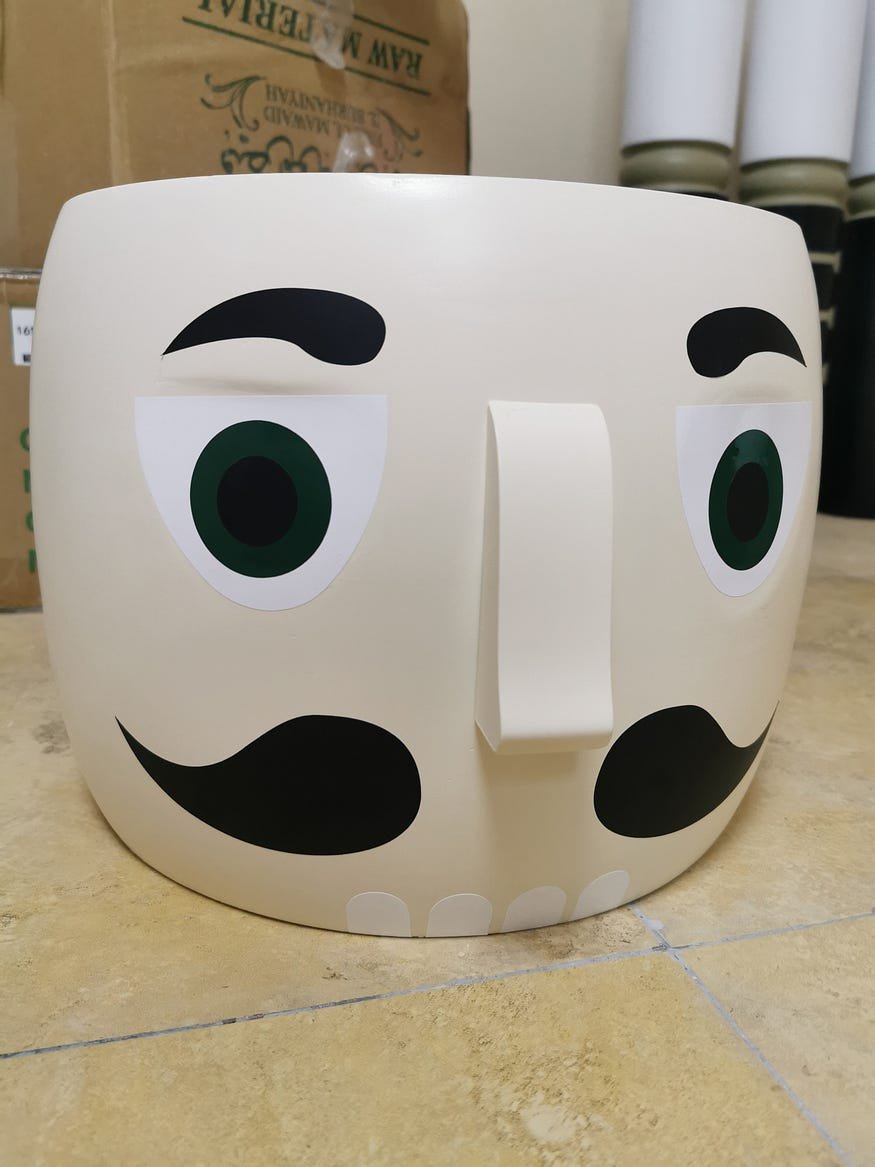
We 3d printed the arms just out of convenience. But for Drum, we wanted to make it lightweight so it can hang without applying too much pressure. If the Drum was made of wood then it would have been 5kg while we were able to 3d print it in 750g. Huge Difference!
Cap we 3d printed to reduce the overall weight and also to have a room for attaching a light bulb and acrylic inside. The advantage of 3d printing was that we can make a part with a small thickness like 3mm but in MDF and lathe machines, the thickness would have been 20–30mm which could create shadows from the edges. Also, the important detail was the cutout of the LED logo which would come out more precisely from 3d printing instead of other manufacturing technique.
Step 2:- Engineering Design

For 3D design, we received a SketchUp file which is never usable for manufacturing. So we ended up remodeling the whole structure in our CAD software.
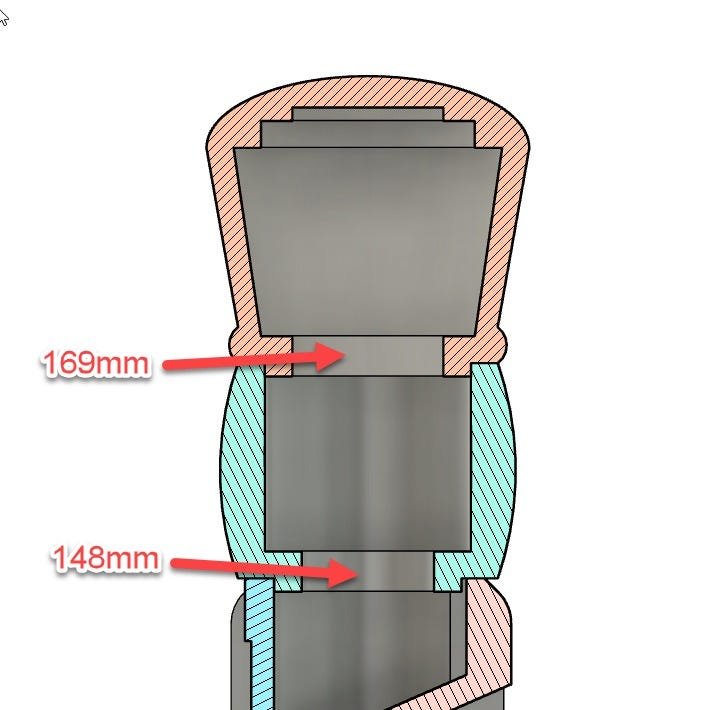
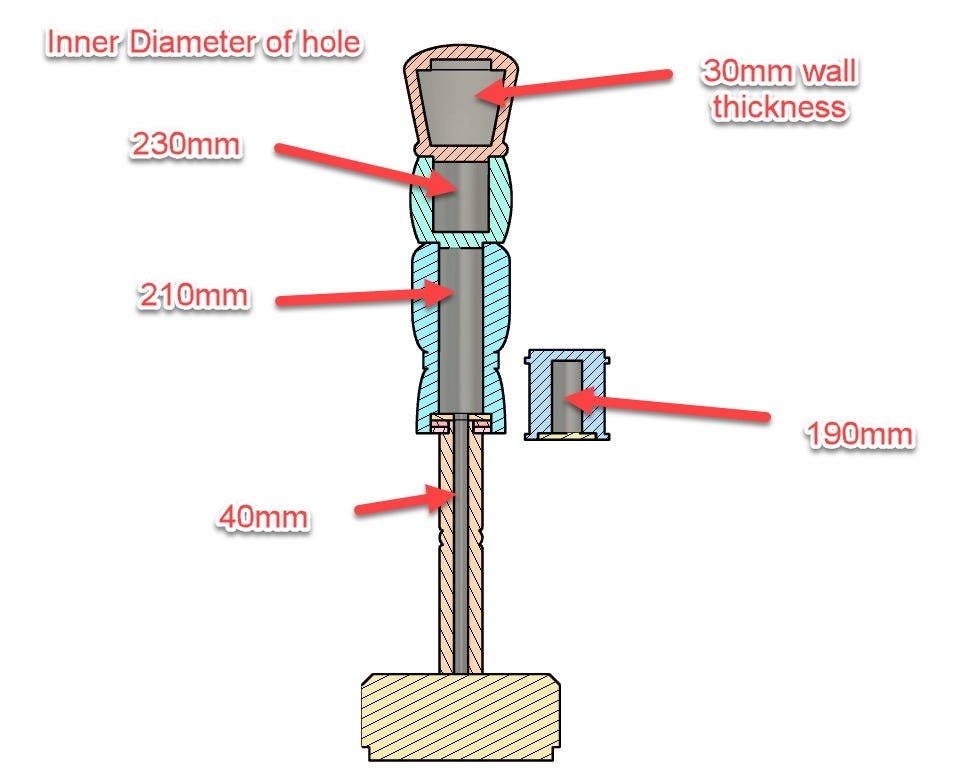
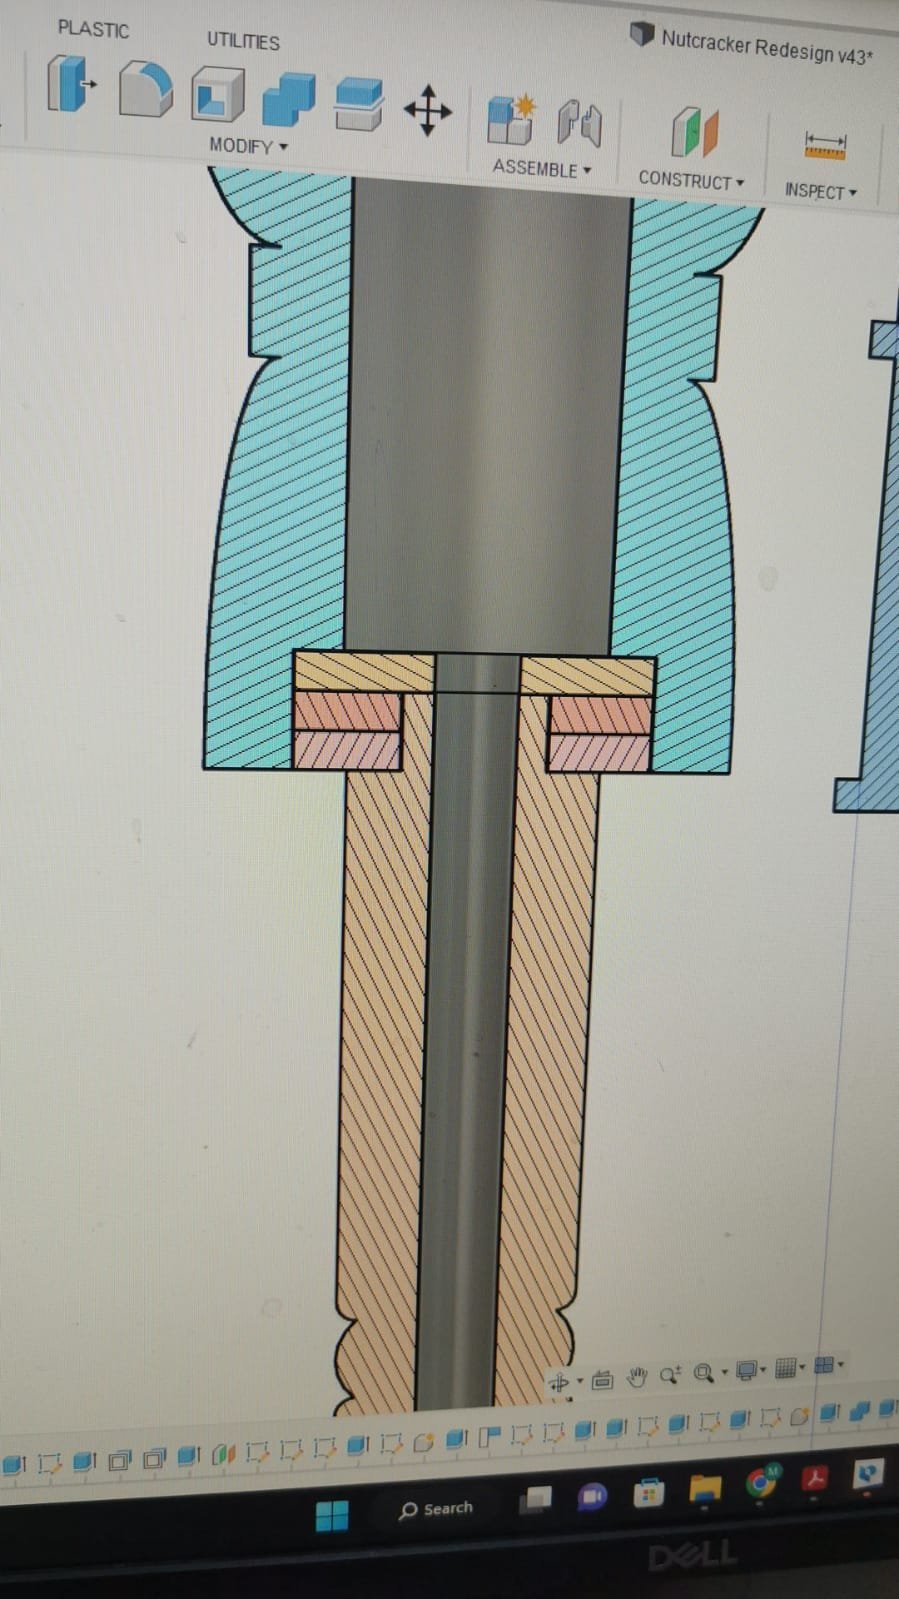
We divide the structure into different parts for the ease of machining and added recesses on each side for the assembly. All the parts are hollow so that wiring can go through from Cap to the base which will have all the electronics stored.
Step 3:- 3D Printing

We 3D printed the Arms of Nutcracker in PETG since it will be placed in the outdoor environment. It was made in pieces due to its large size and also for ease of painting.
Step 4:- CNC cutting wooden raw block for lathe machine
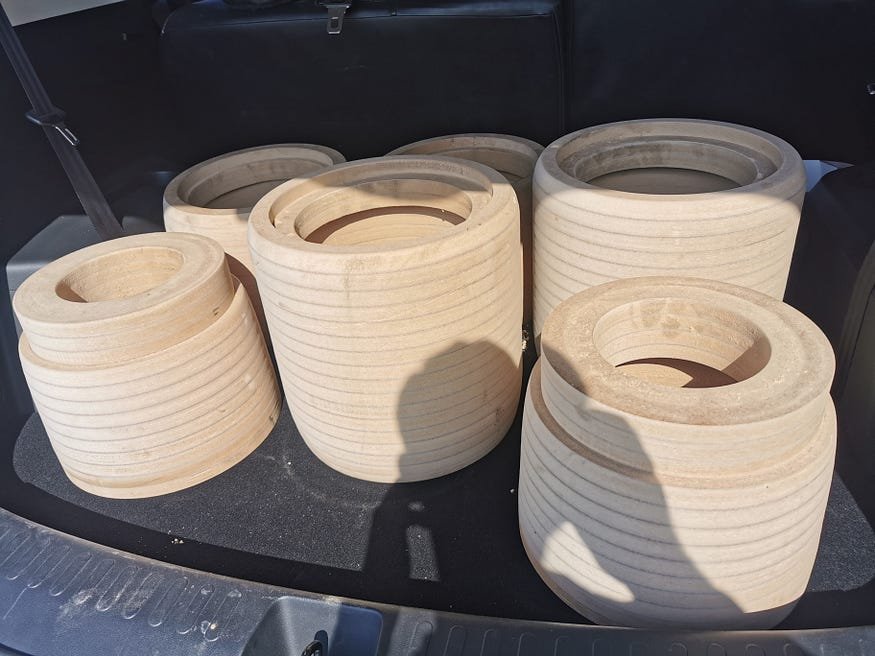
Since I cannot find a ready-made block for lathe machining. SoI had to hire carpentry to make a custom raw block. The good part is that they made the cylinders in the exact diameter for the nutcracker parts and even added recess. This minimized the amount of work done on lathe machine and my lathe machine guy just need to add curved and radius according to the design.
All the parts are made hollow for the wires to pass through and also to reduce the amount of weight.
Step 5:- Lathe Machining
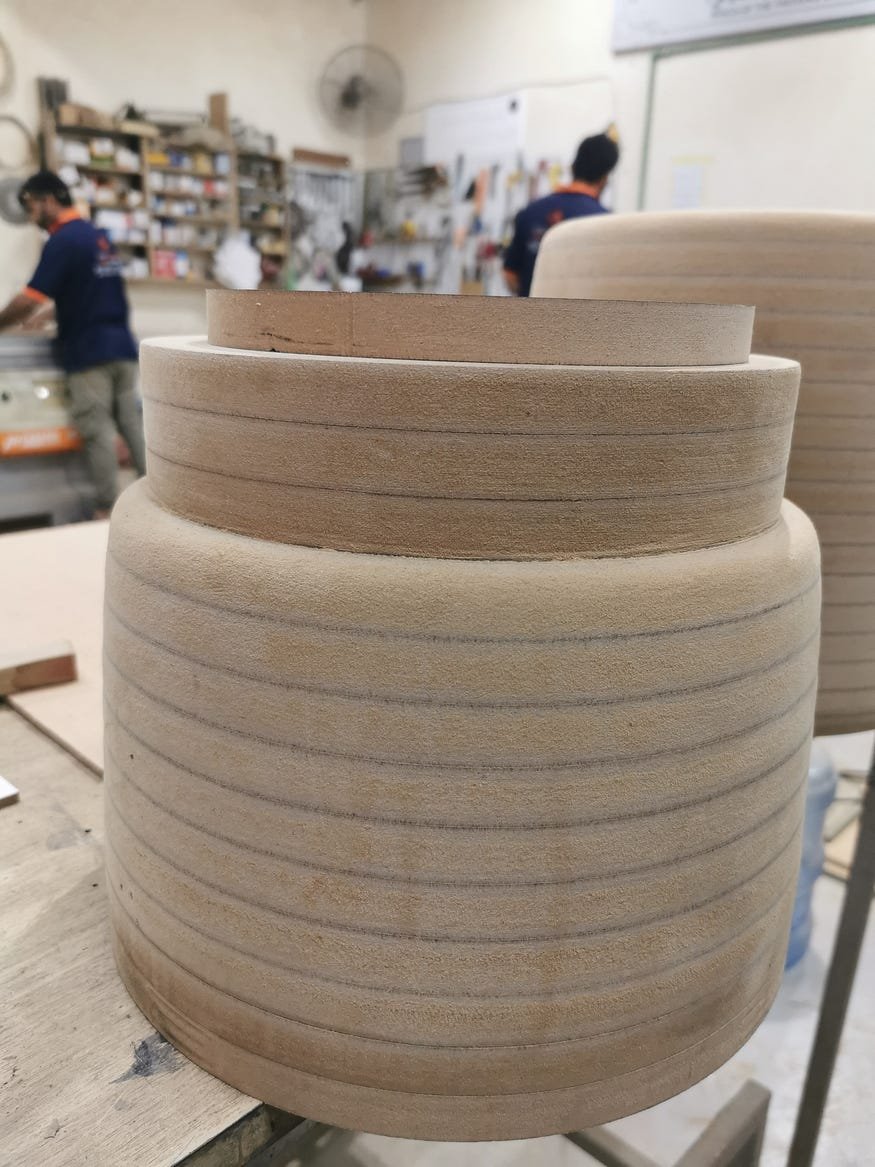
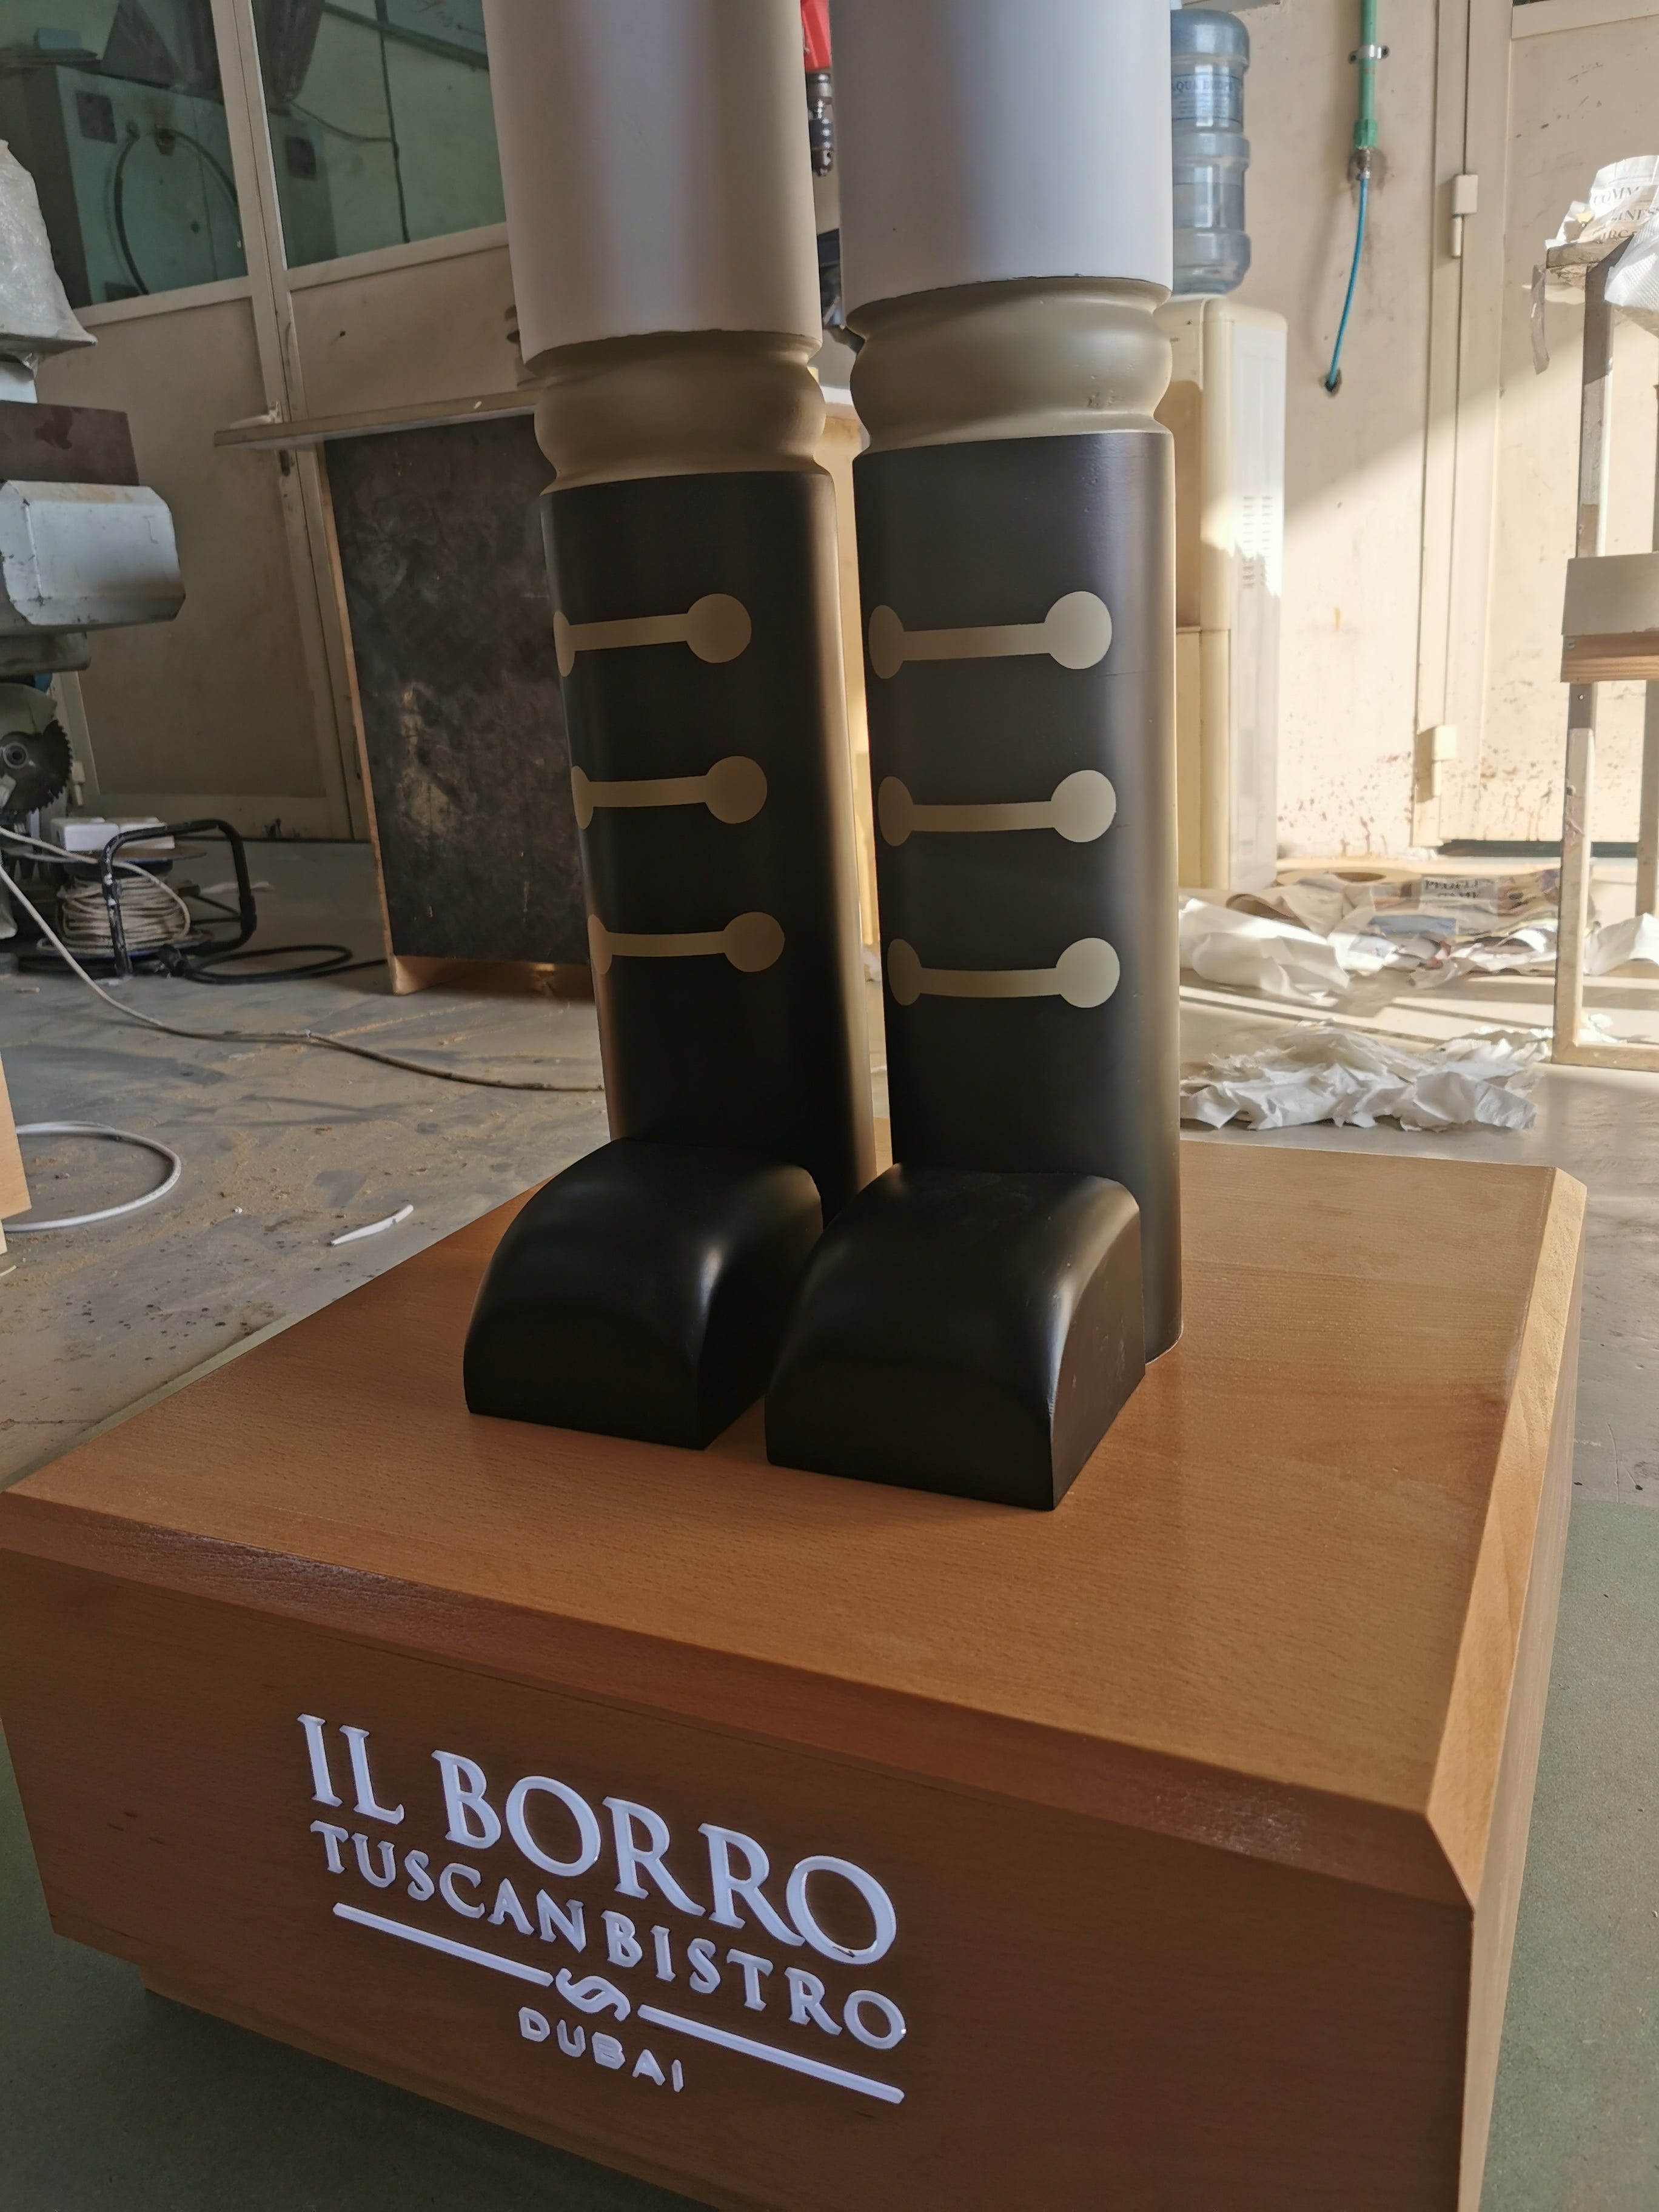
All the radius, curves and chamfers were added according to the drawing in lathe machining process. Legs is the longest parts in nutcracker body for machining so they had to make a custom bearing on both the ends of cylinder for clamping.
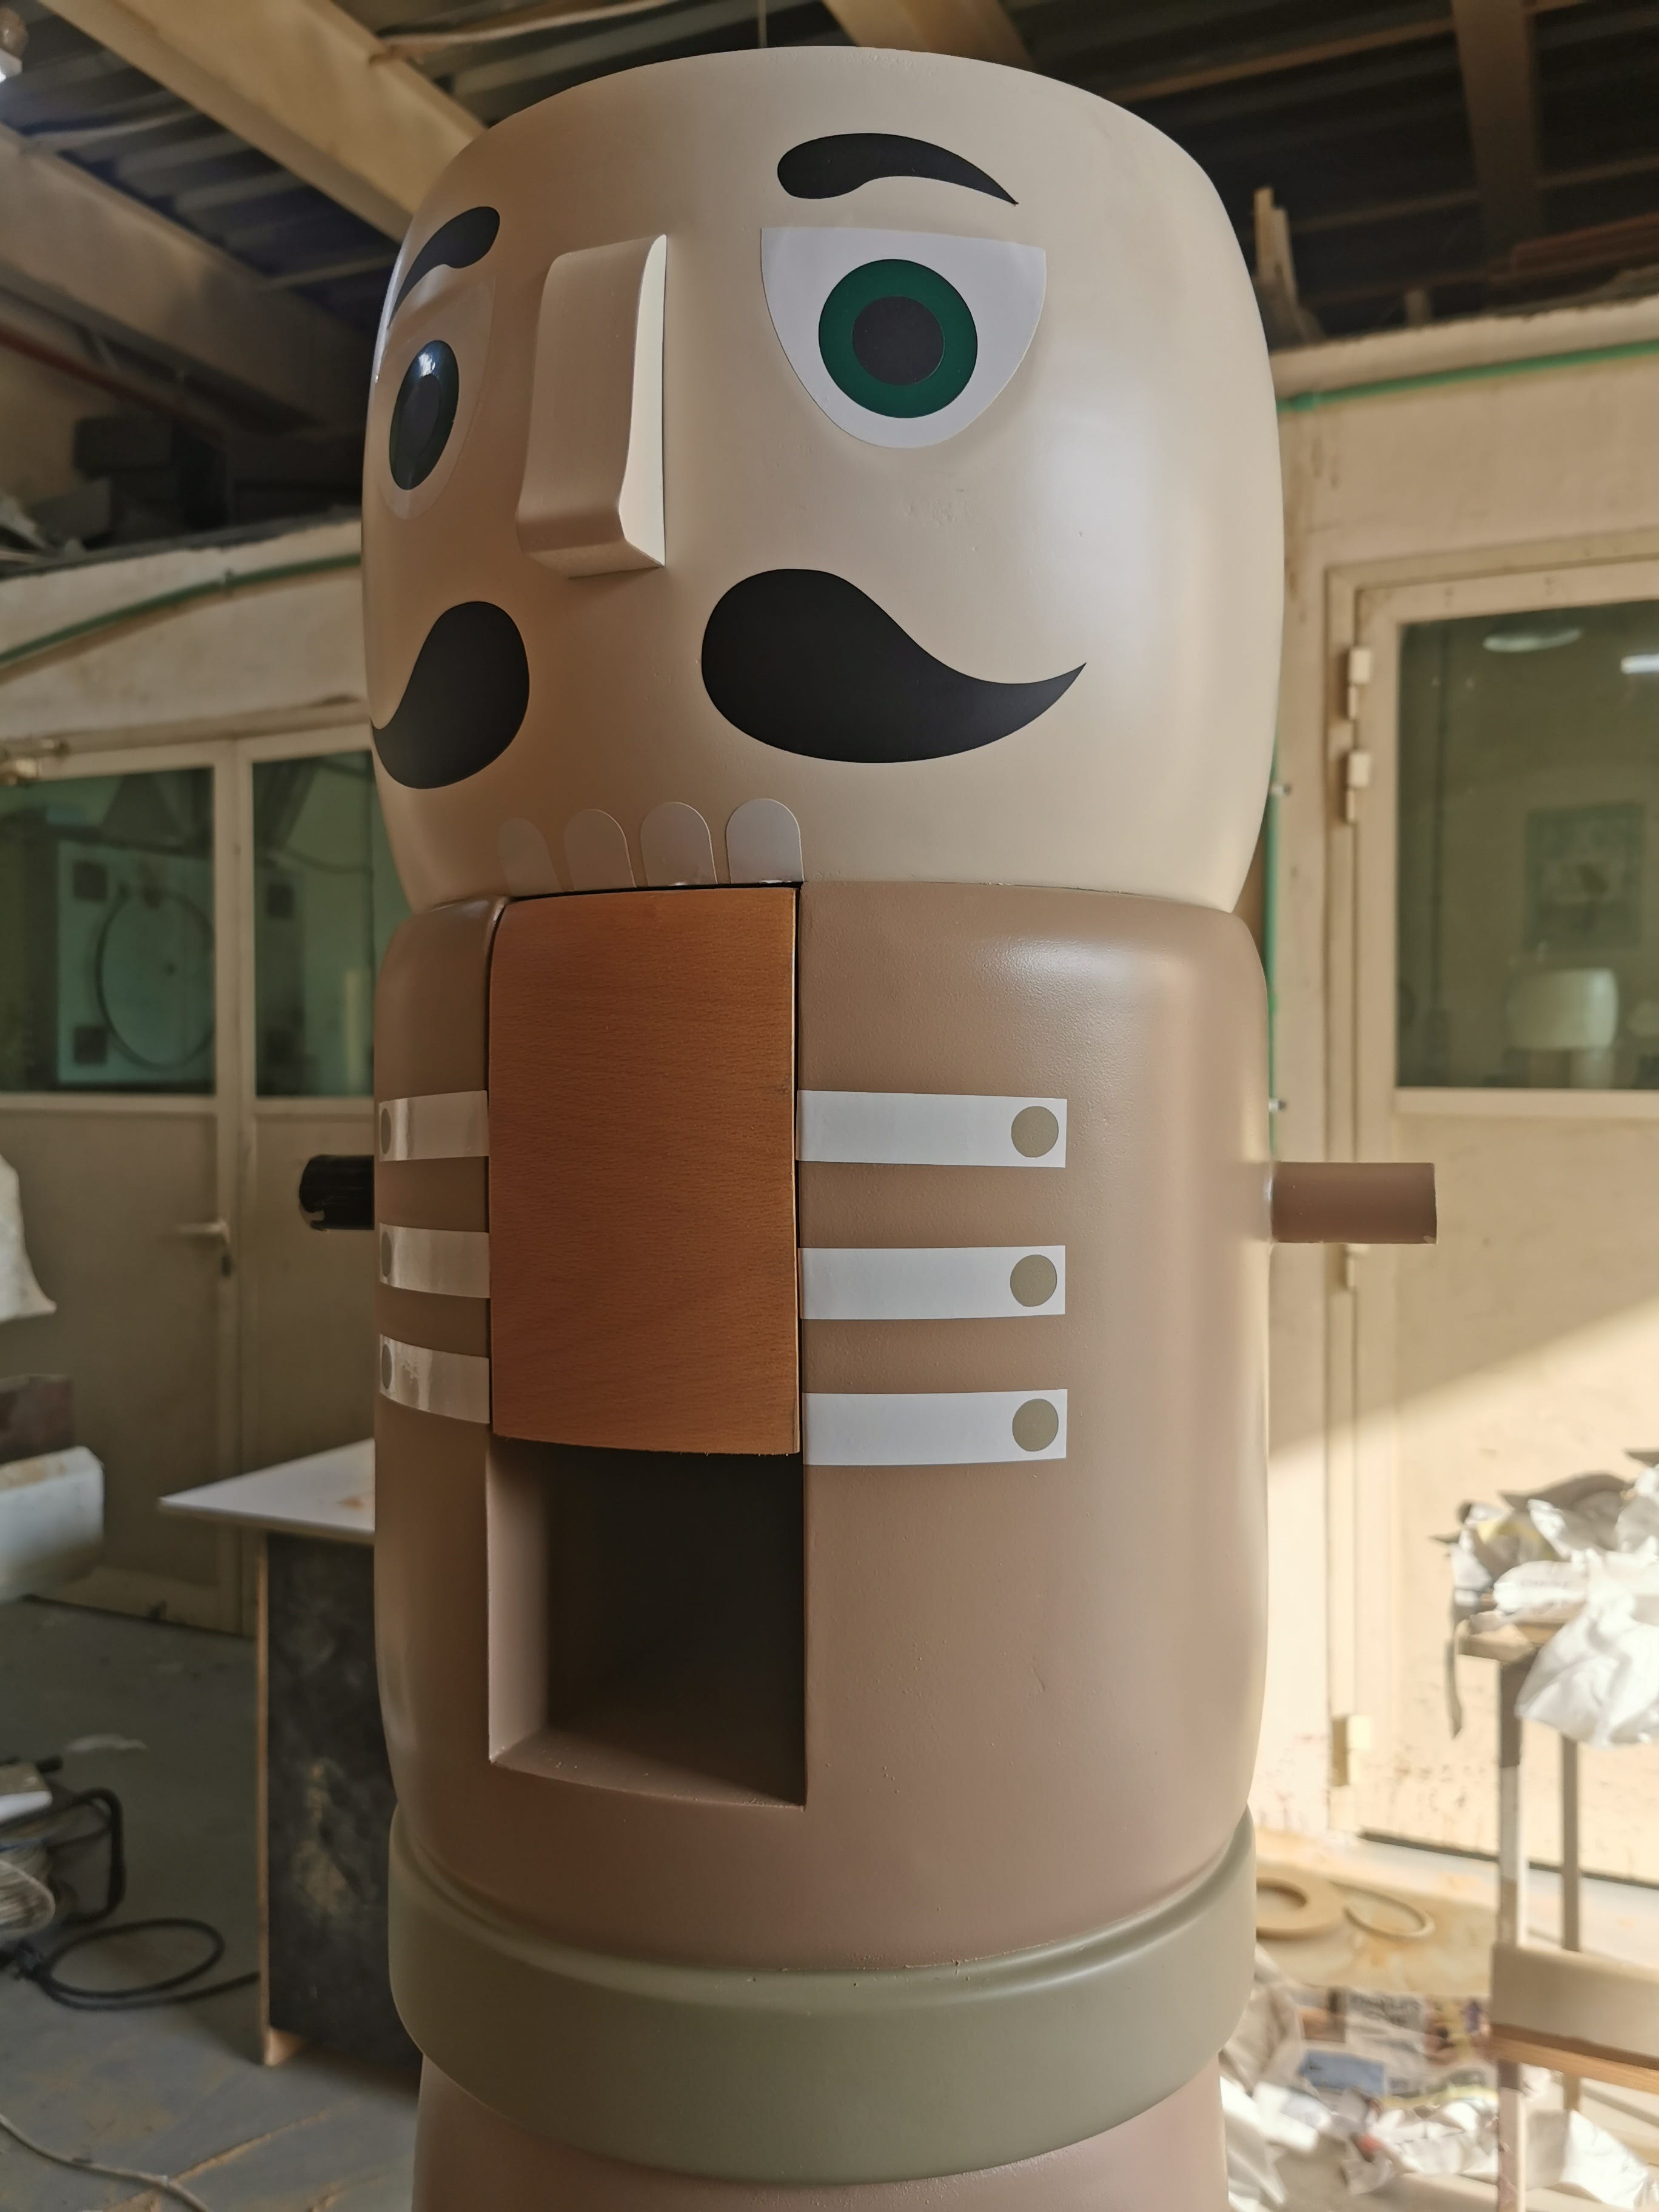
Step 6:- Carving Eyes
I wanted to give some depth on eyes for some realistic effect. First we created a vinyl stencil and applied it on the face for the marking. Then we took sanding machine to remove the material of the surface.
This we had to improvise since its the first time we tried to make a depth. But I would say that we did a fairly good job for a first-timer wood carving.
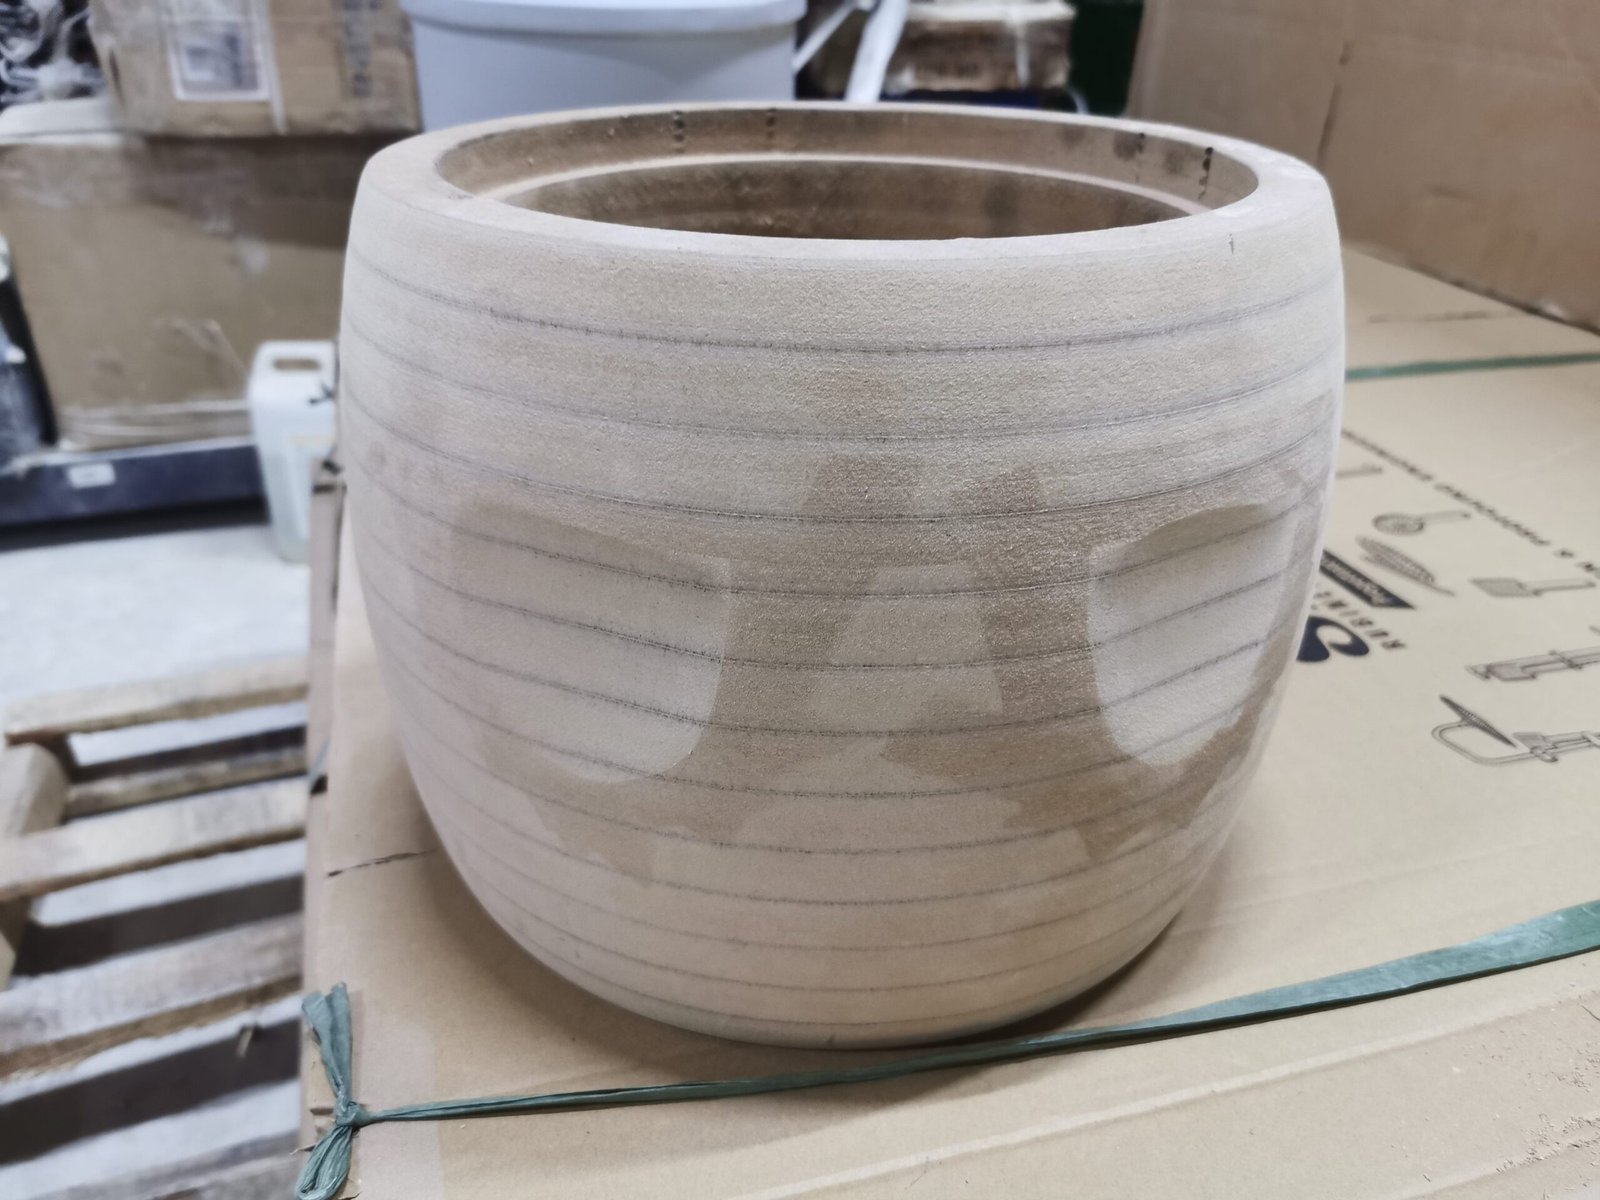
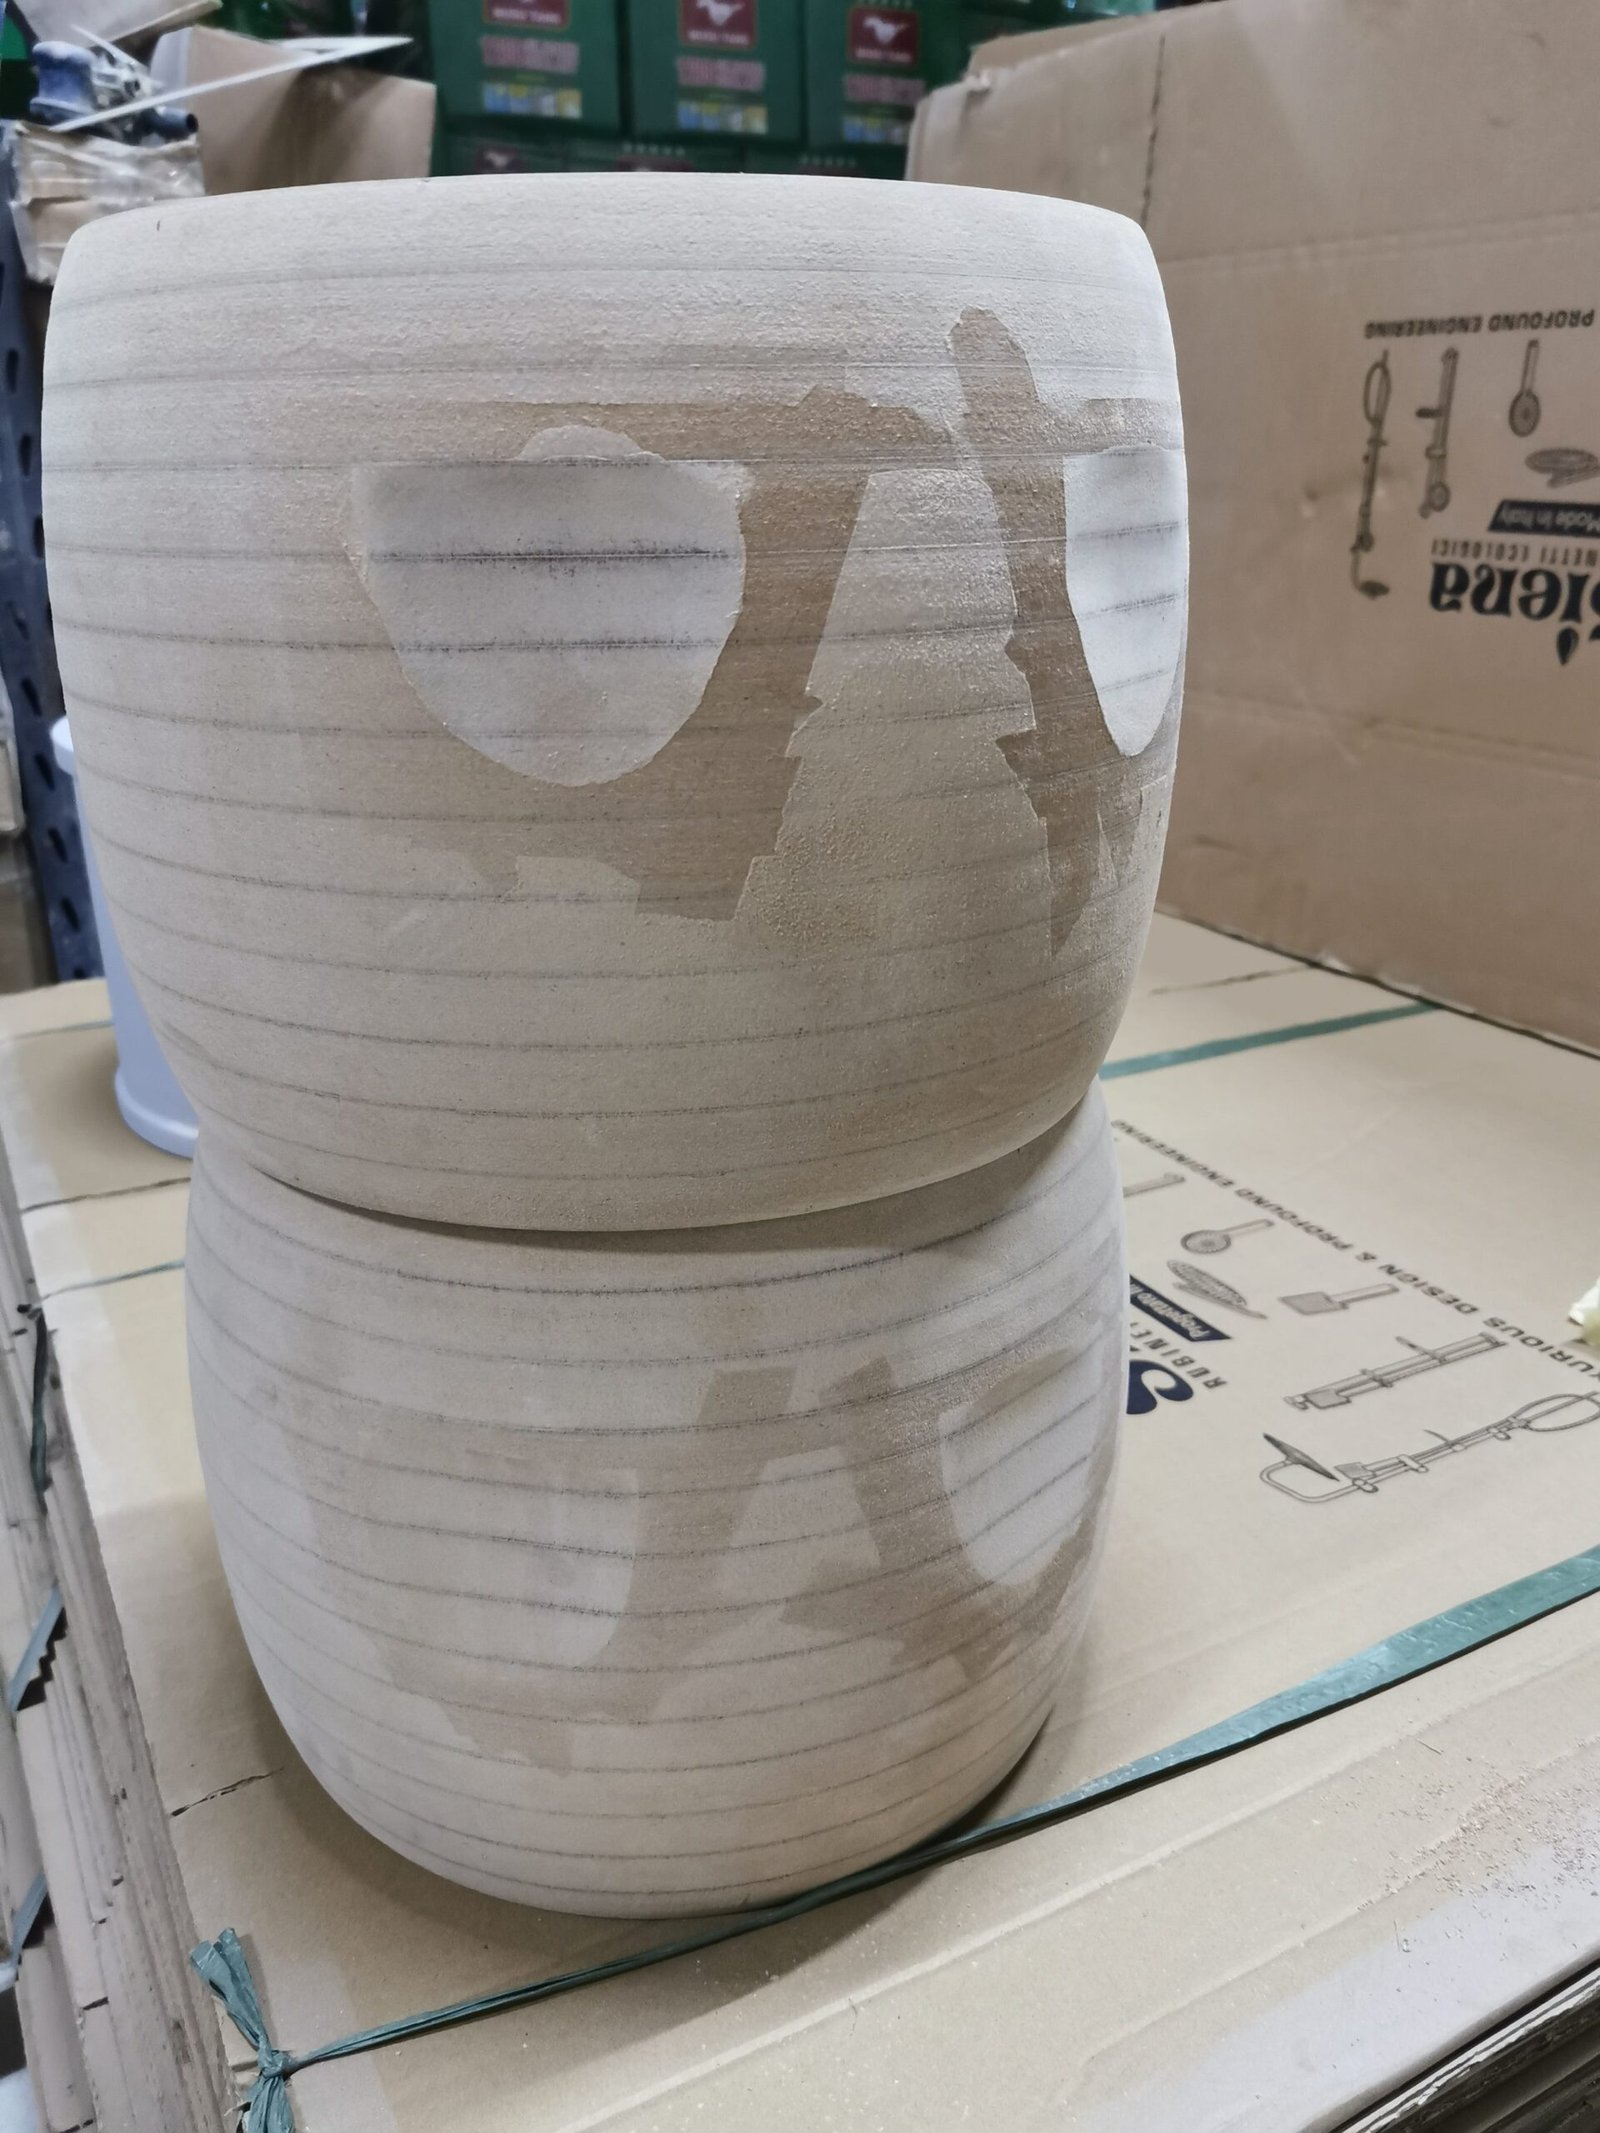
Step 7:- Sanding, Priming & Paint Finish

This was the longest and most time-consuming step. By this time even a 3D-printed drum was finished. We put the first color on all the parts.
Step 8:- Creating Stencils

We created painting stencils of vinyl for precise finishing. I can tell you that this was one of the best decisions in my life.
This is the first time we are using the vinyl machine for painting stencils and I am impressed with the results.
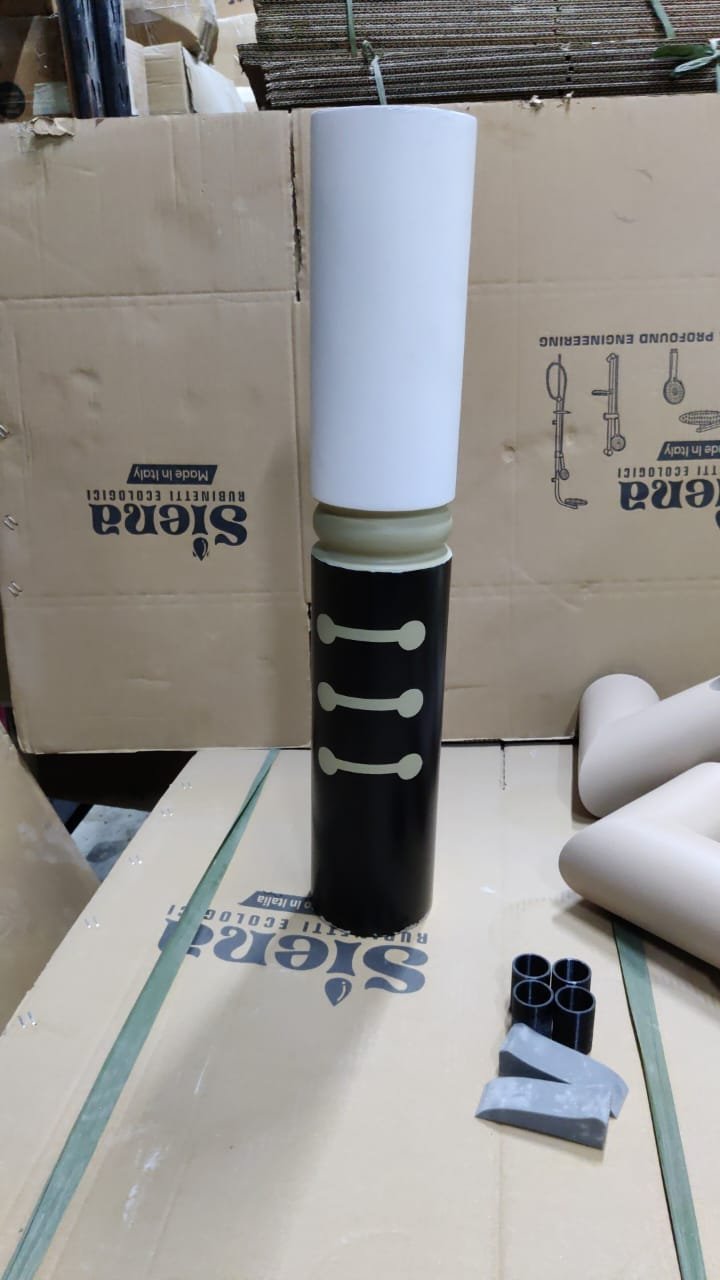
Those buttons on the leg is made by painting with vinyl stencils. After this we continued using stencils for rest of the details. If you are wondering what are those grey color objects on the sides then those are the nose of Nutcracker. I wanted to reduce the finishing time so we made it in resin.
Step 9:- Detailing on the Face
The results were pretty impressive. At a later stage, we replaced most of the vinyl with paint according to client request. But I liked the way things were going. Can’t wait to join all the pieces.
Step 10:- Painting of the body & Helmet

Paint Finishing on body and helmet were some of the last item remaining. We are making 2 different designs of nutcracker and hence different color of helmet. There were white and dark blue strips on the body which we made using similar width of masking tape.
One of the tricky part was bending the acrylic according to the curve of helmet. It required some experimentation to do this by adjusting the design file but it was easier than I thought.
We heated the acrylic, put the cloth on 3D printed helmet and pressed acrylic on top of it. The actual helmet was used as a mold.
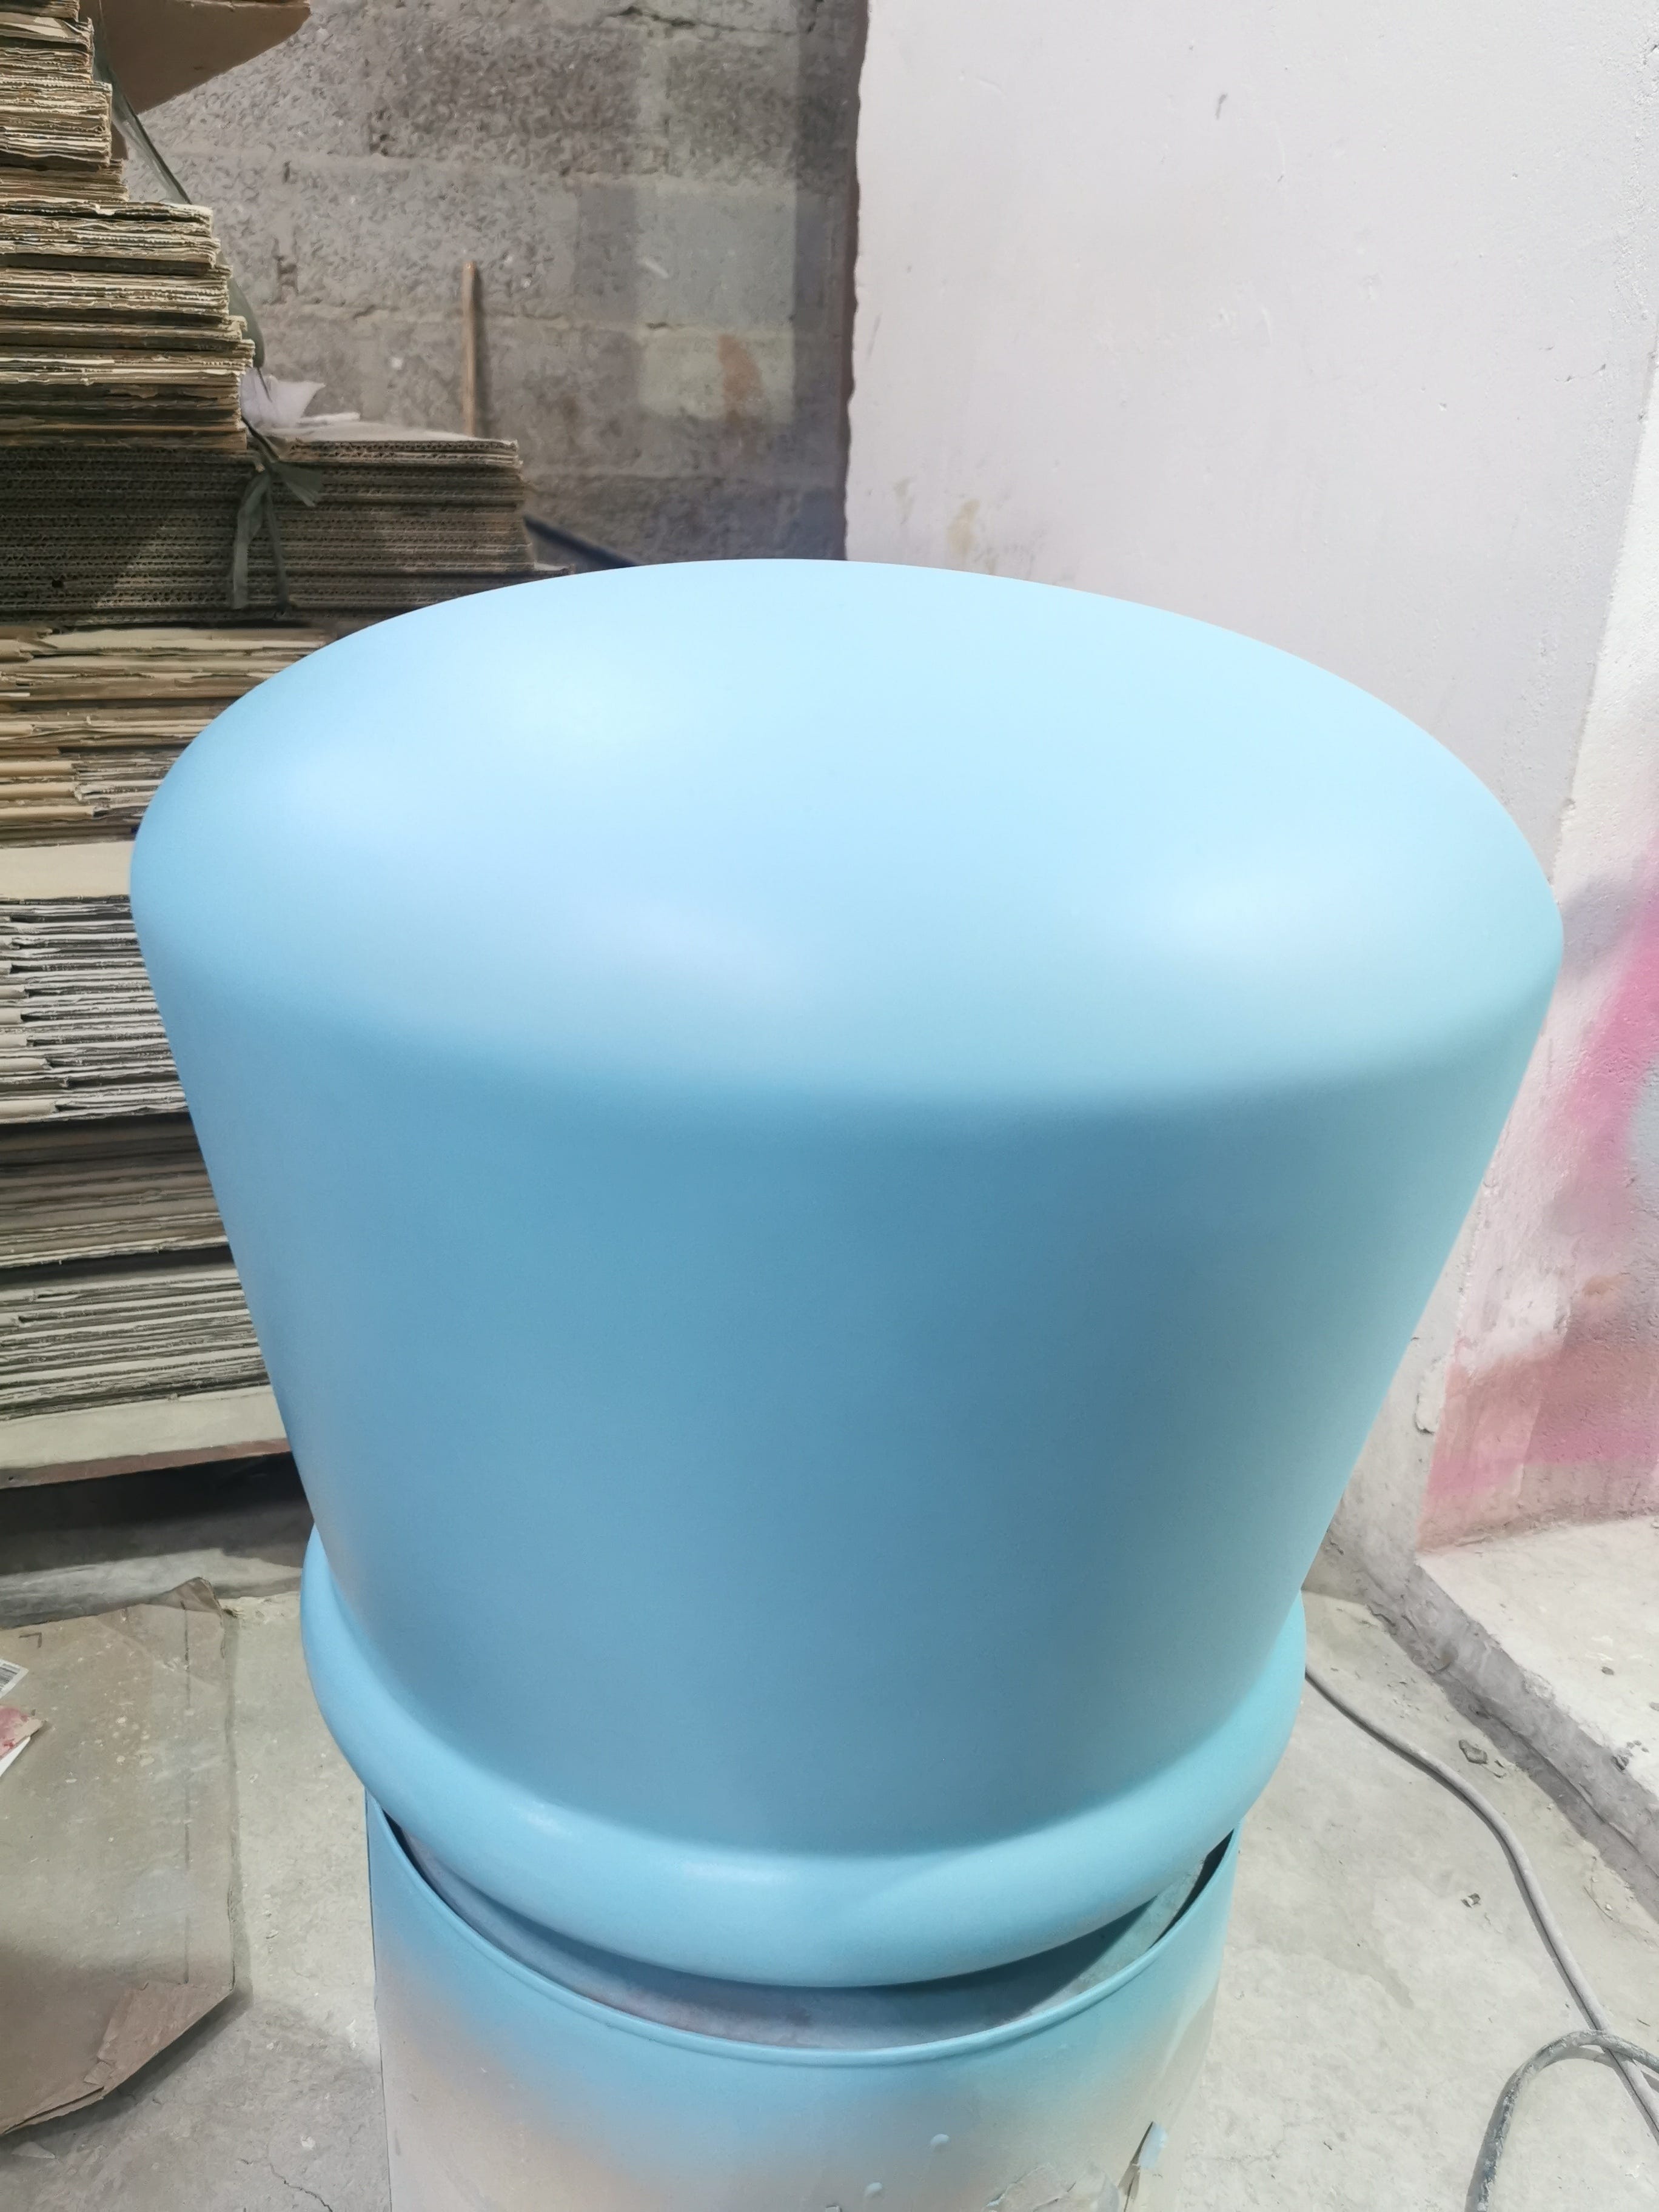
Step 11:- Making the LED base of the Nutcracker
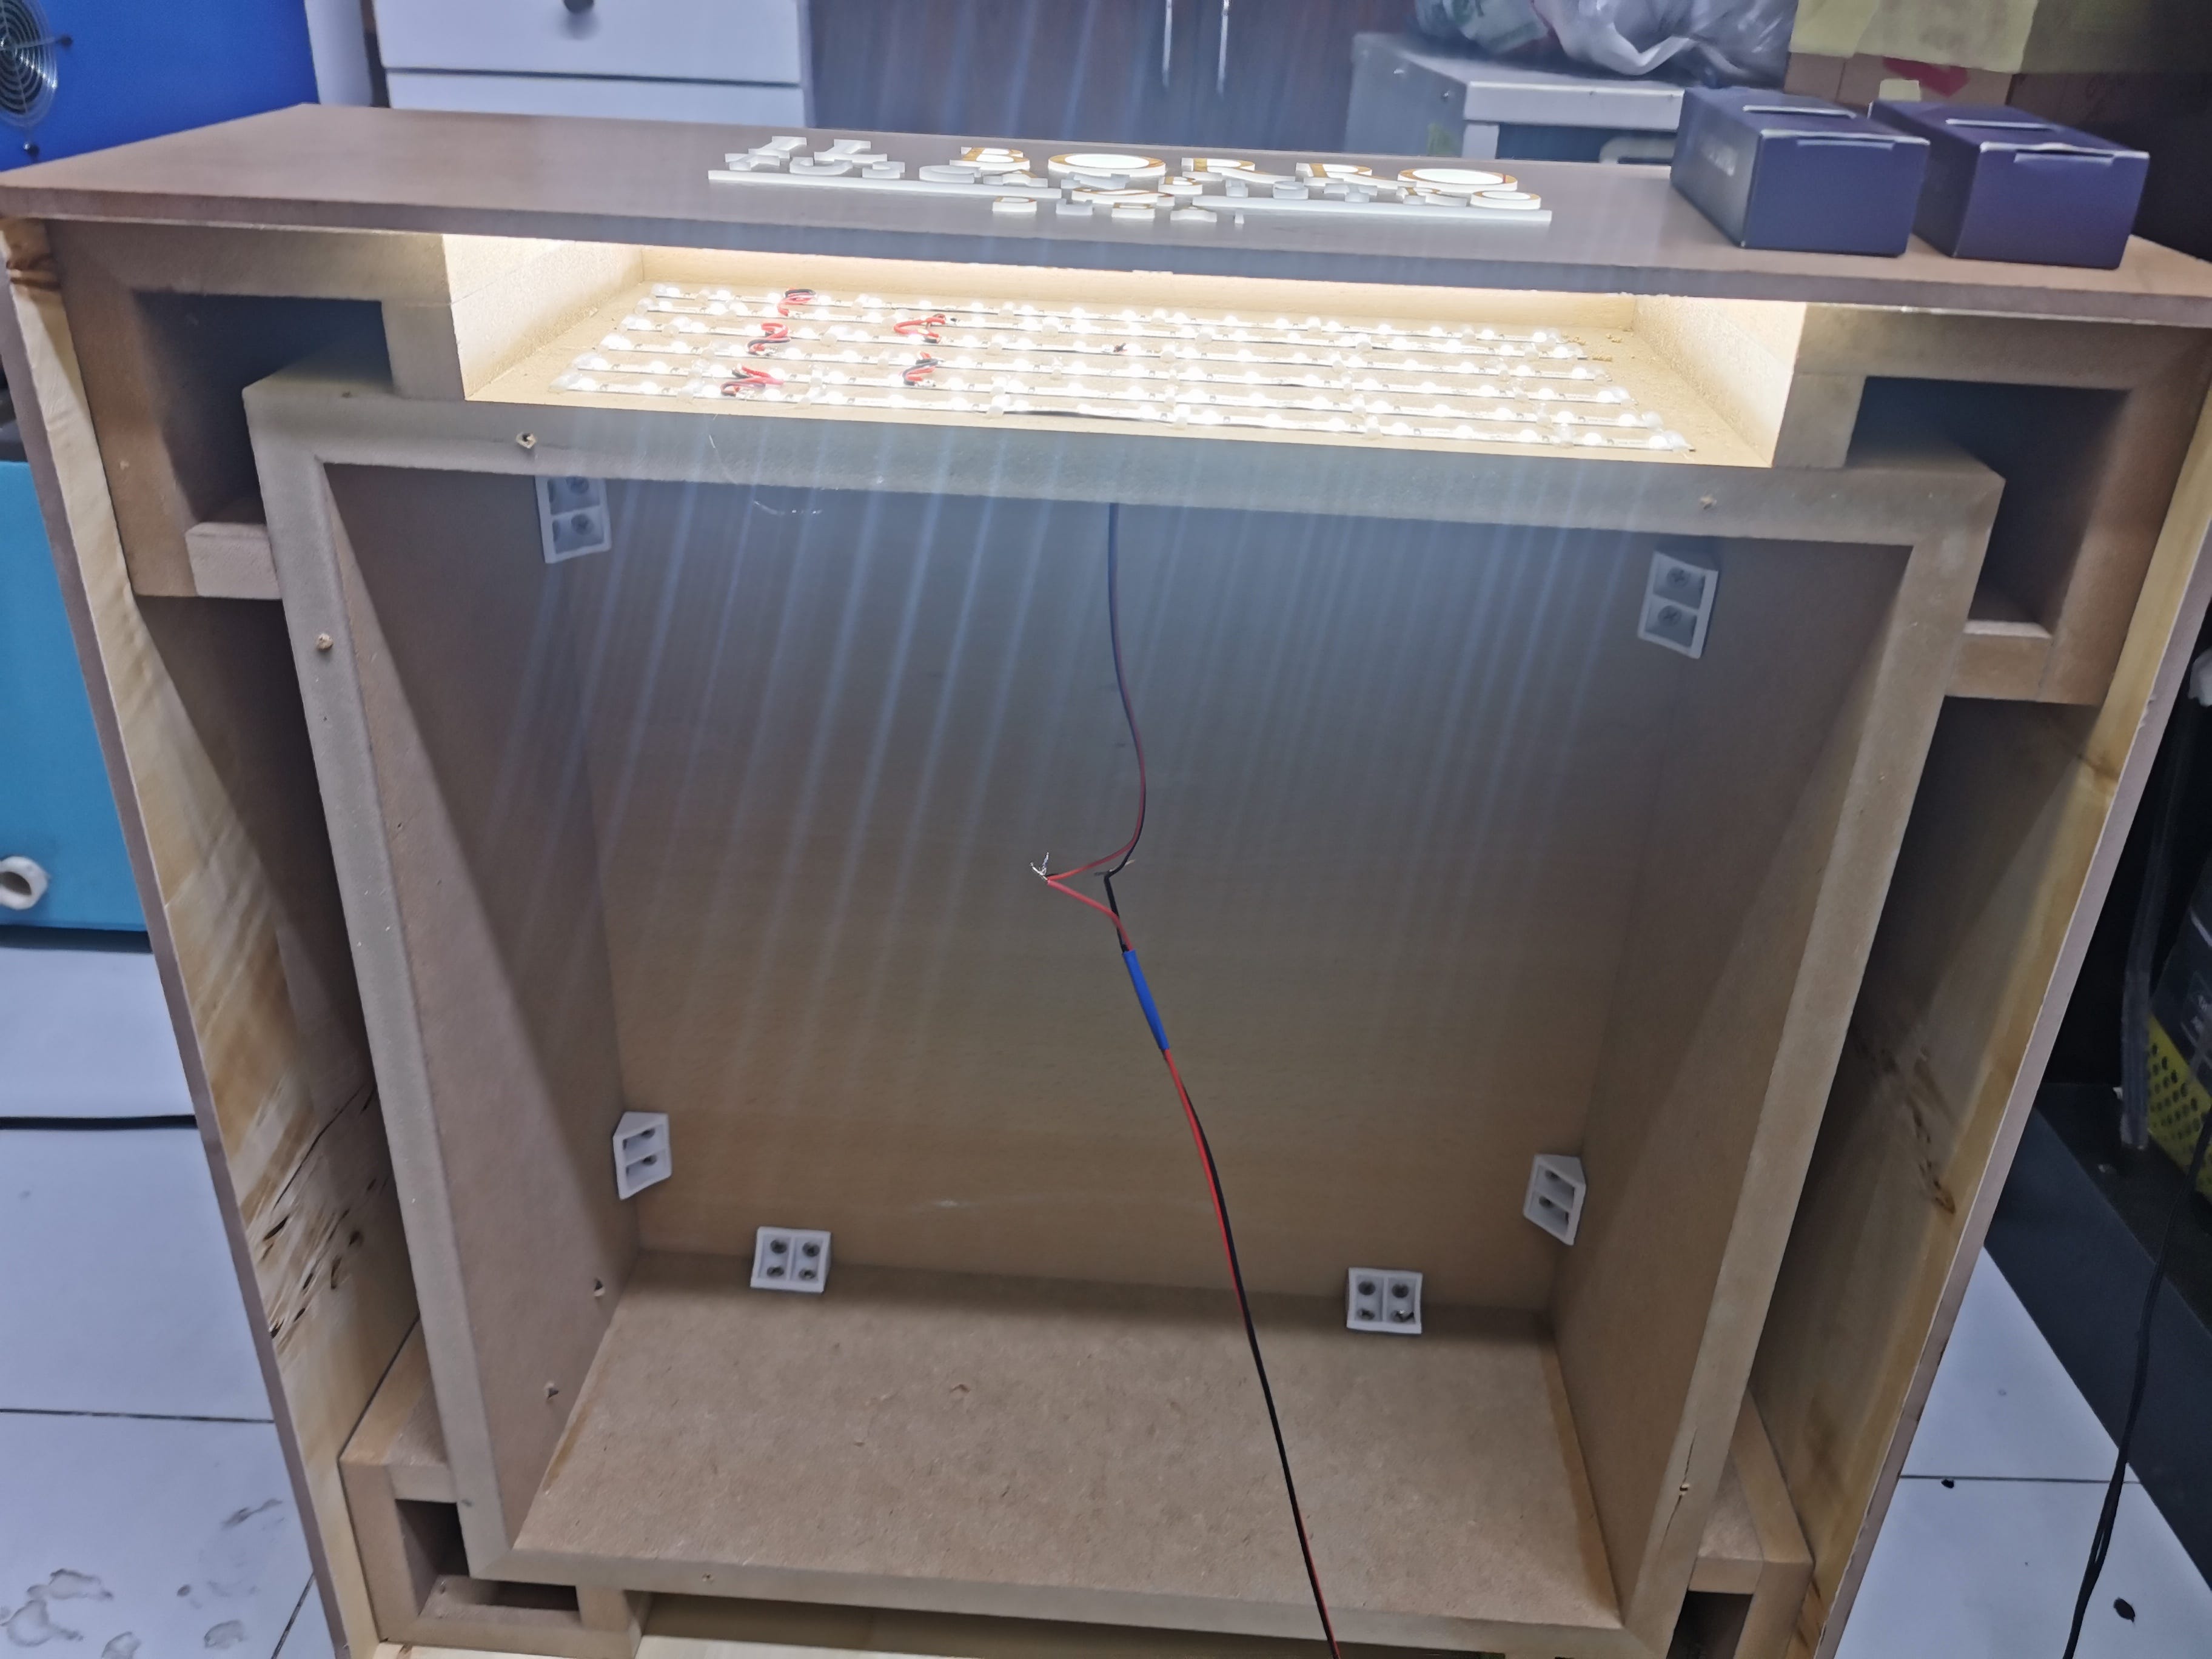
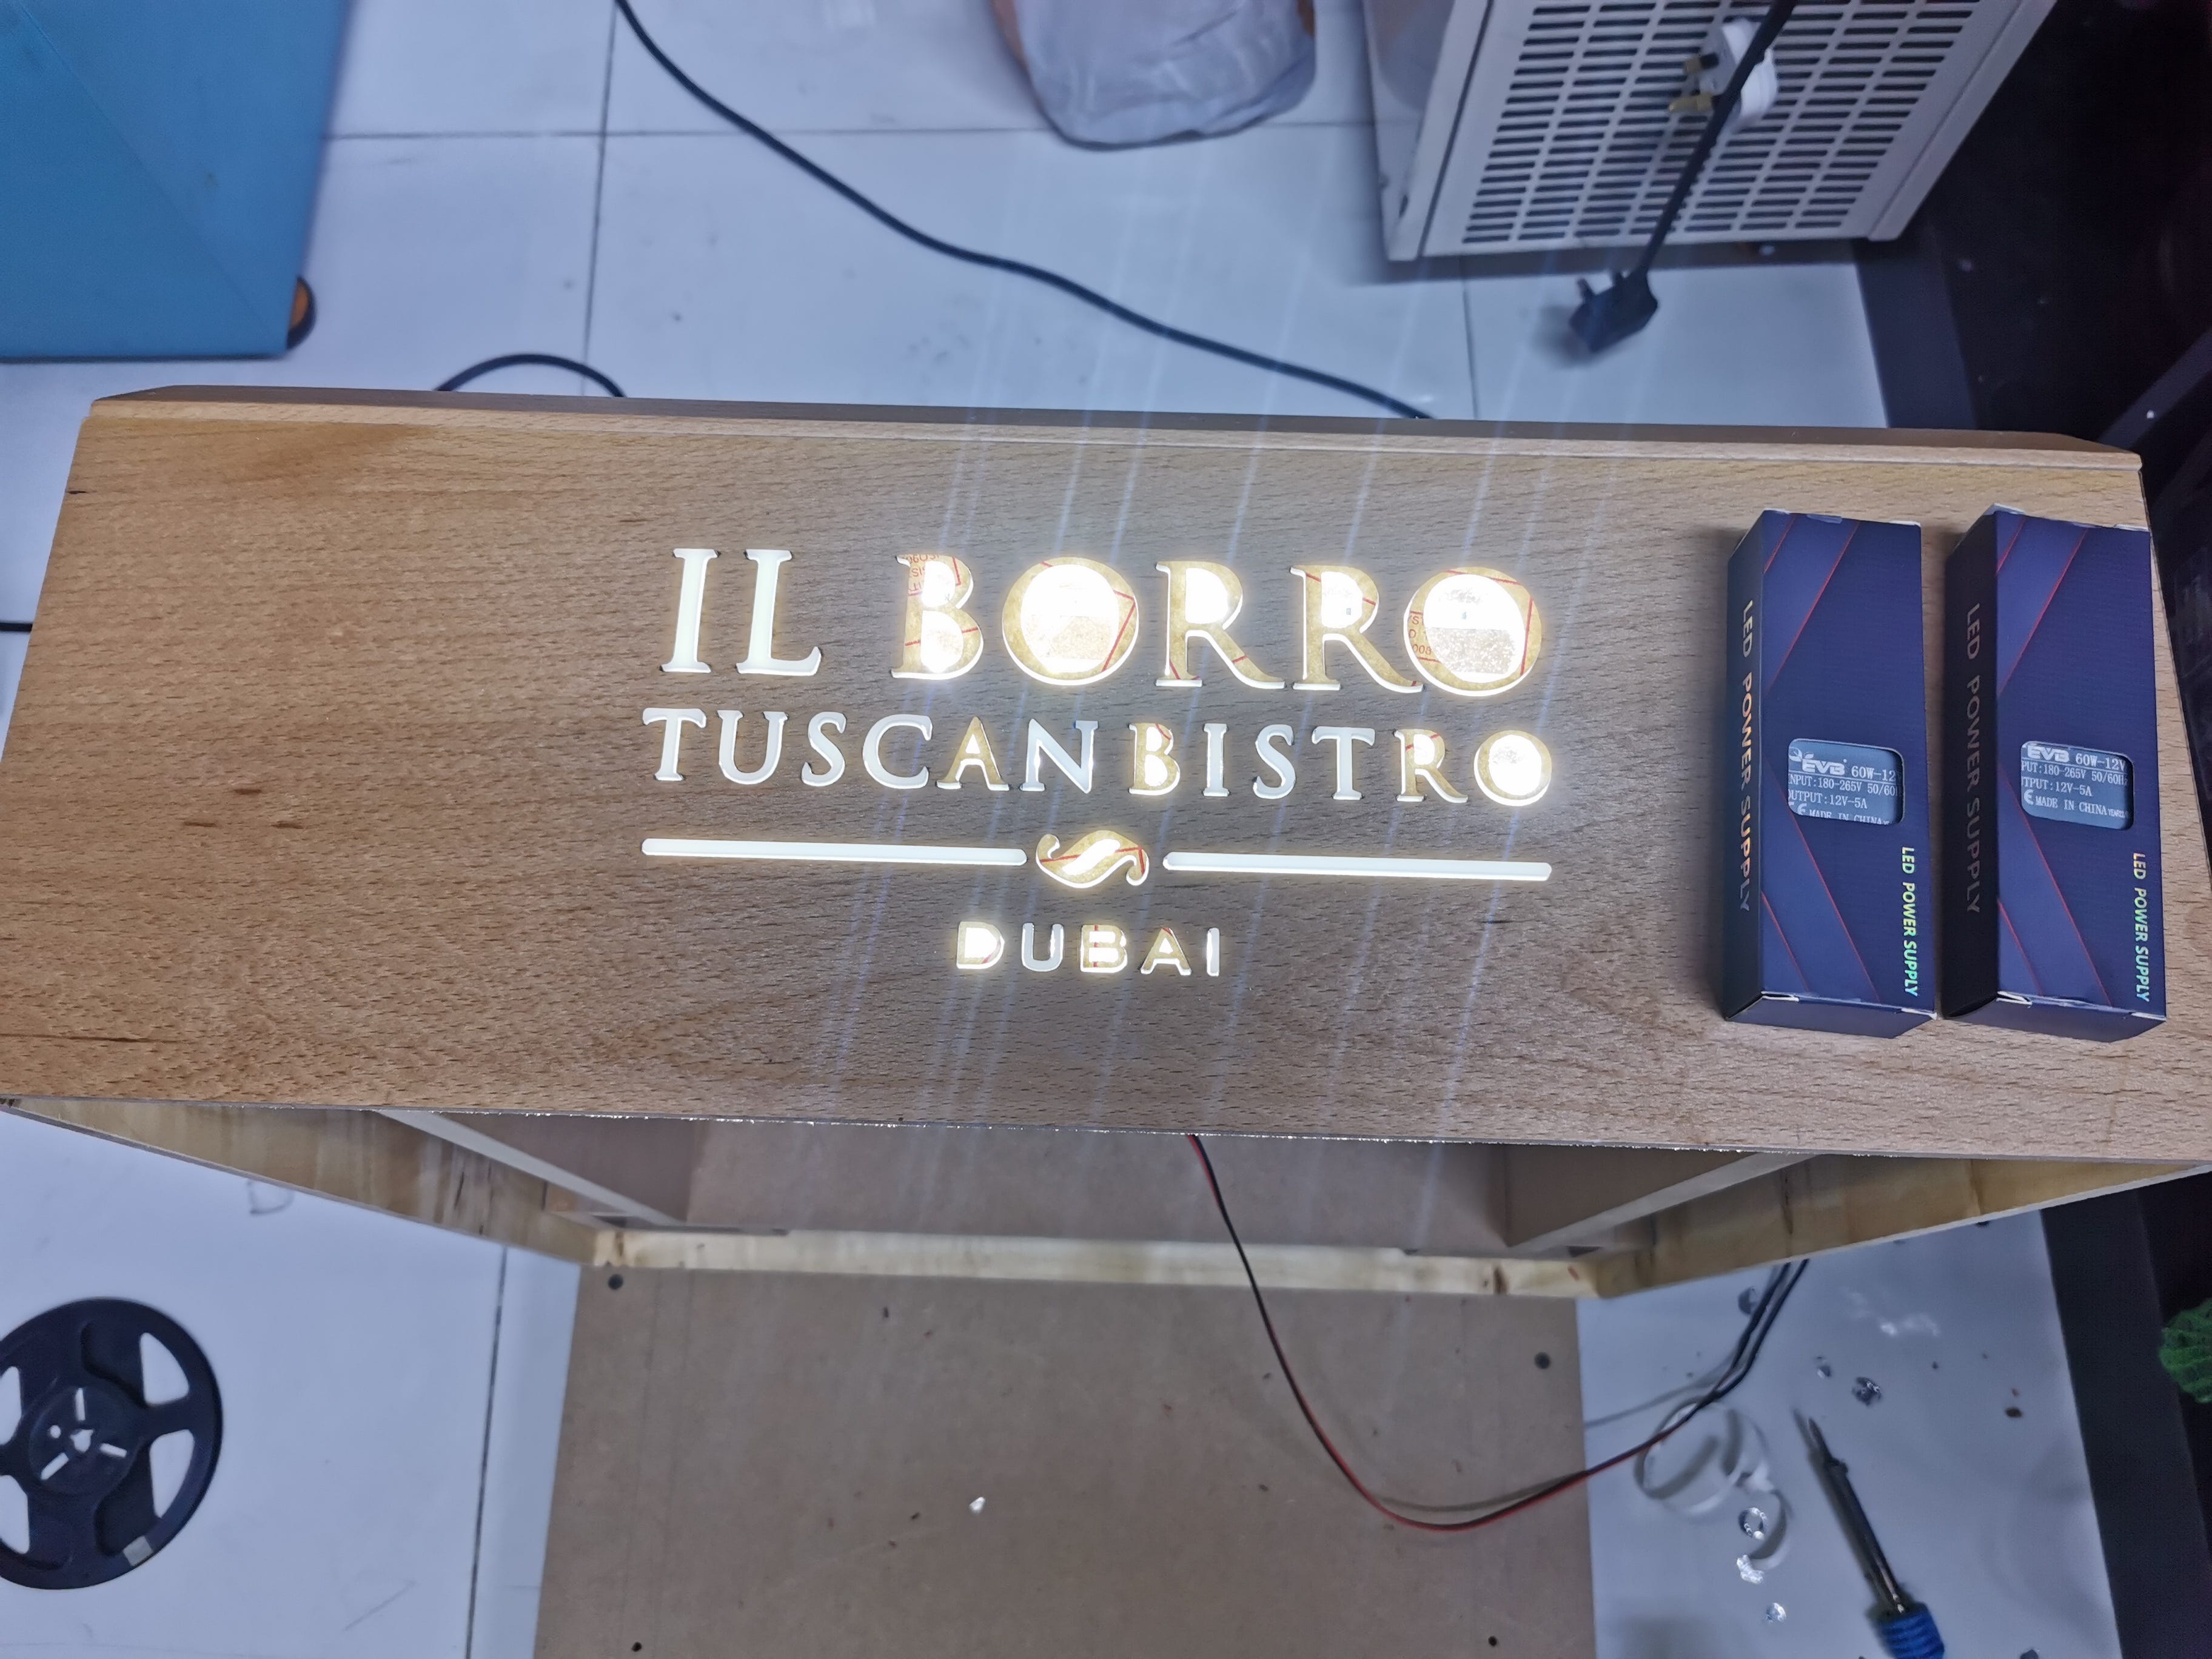
The base of the nutcracker was made in MDF structure and the outer part was finished in veneer wood. LED lights were placed under the layer of wood, followed by transparent acrylic to support the white color acrylic on top of it.
The empty space on the acrylic will get filled by wood to block the lights from there.
Step 12:- Bringing it all together
Its was a 1 days work to join all the parts. Arms were joined with the main body through a wooden pin. We screwed it from the back through the wooden pin to make it permanent.
The assembly and some final finishing when on till midnight since we had to deliver it urgently but we still made it.
Project Completion
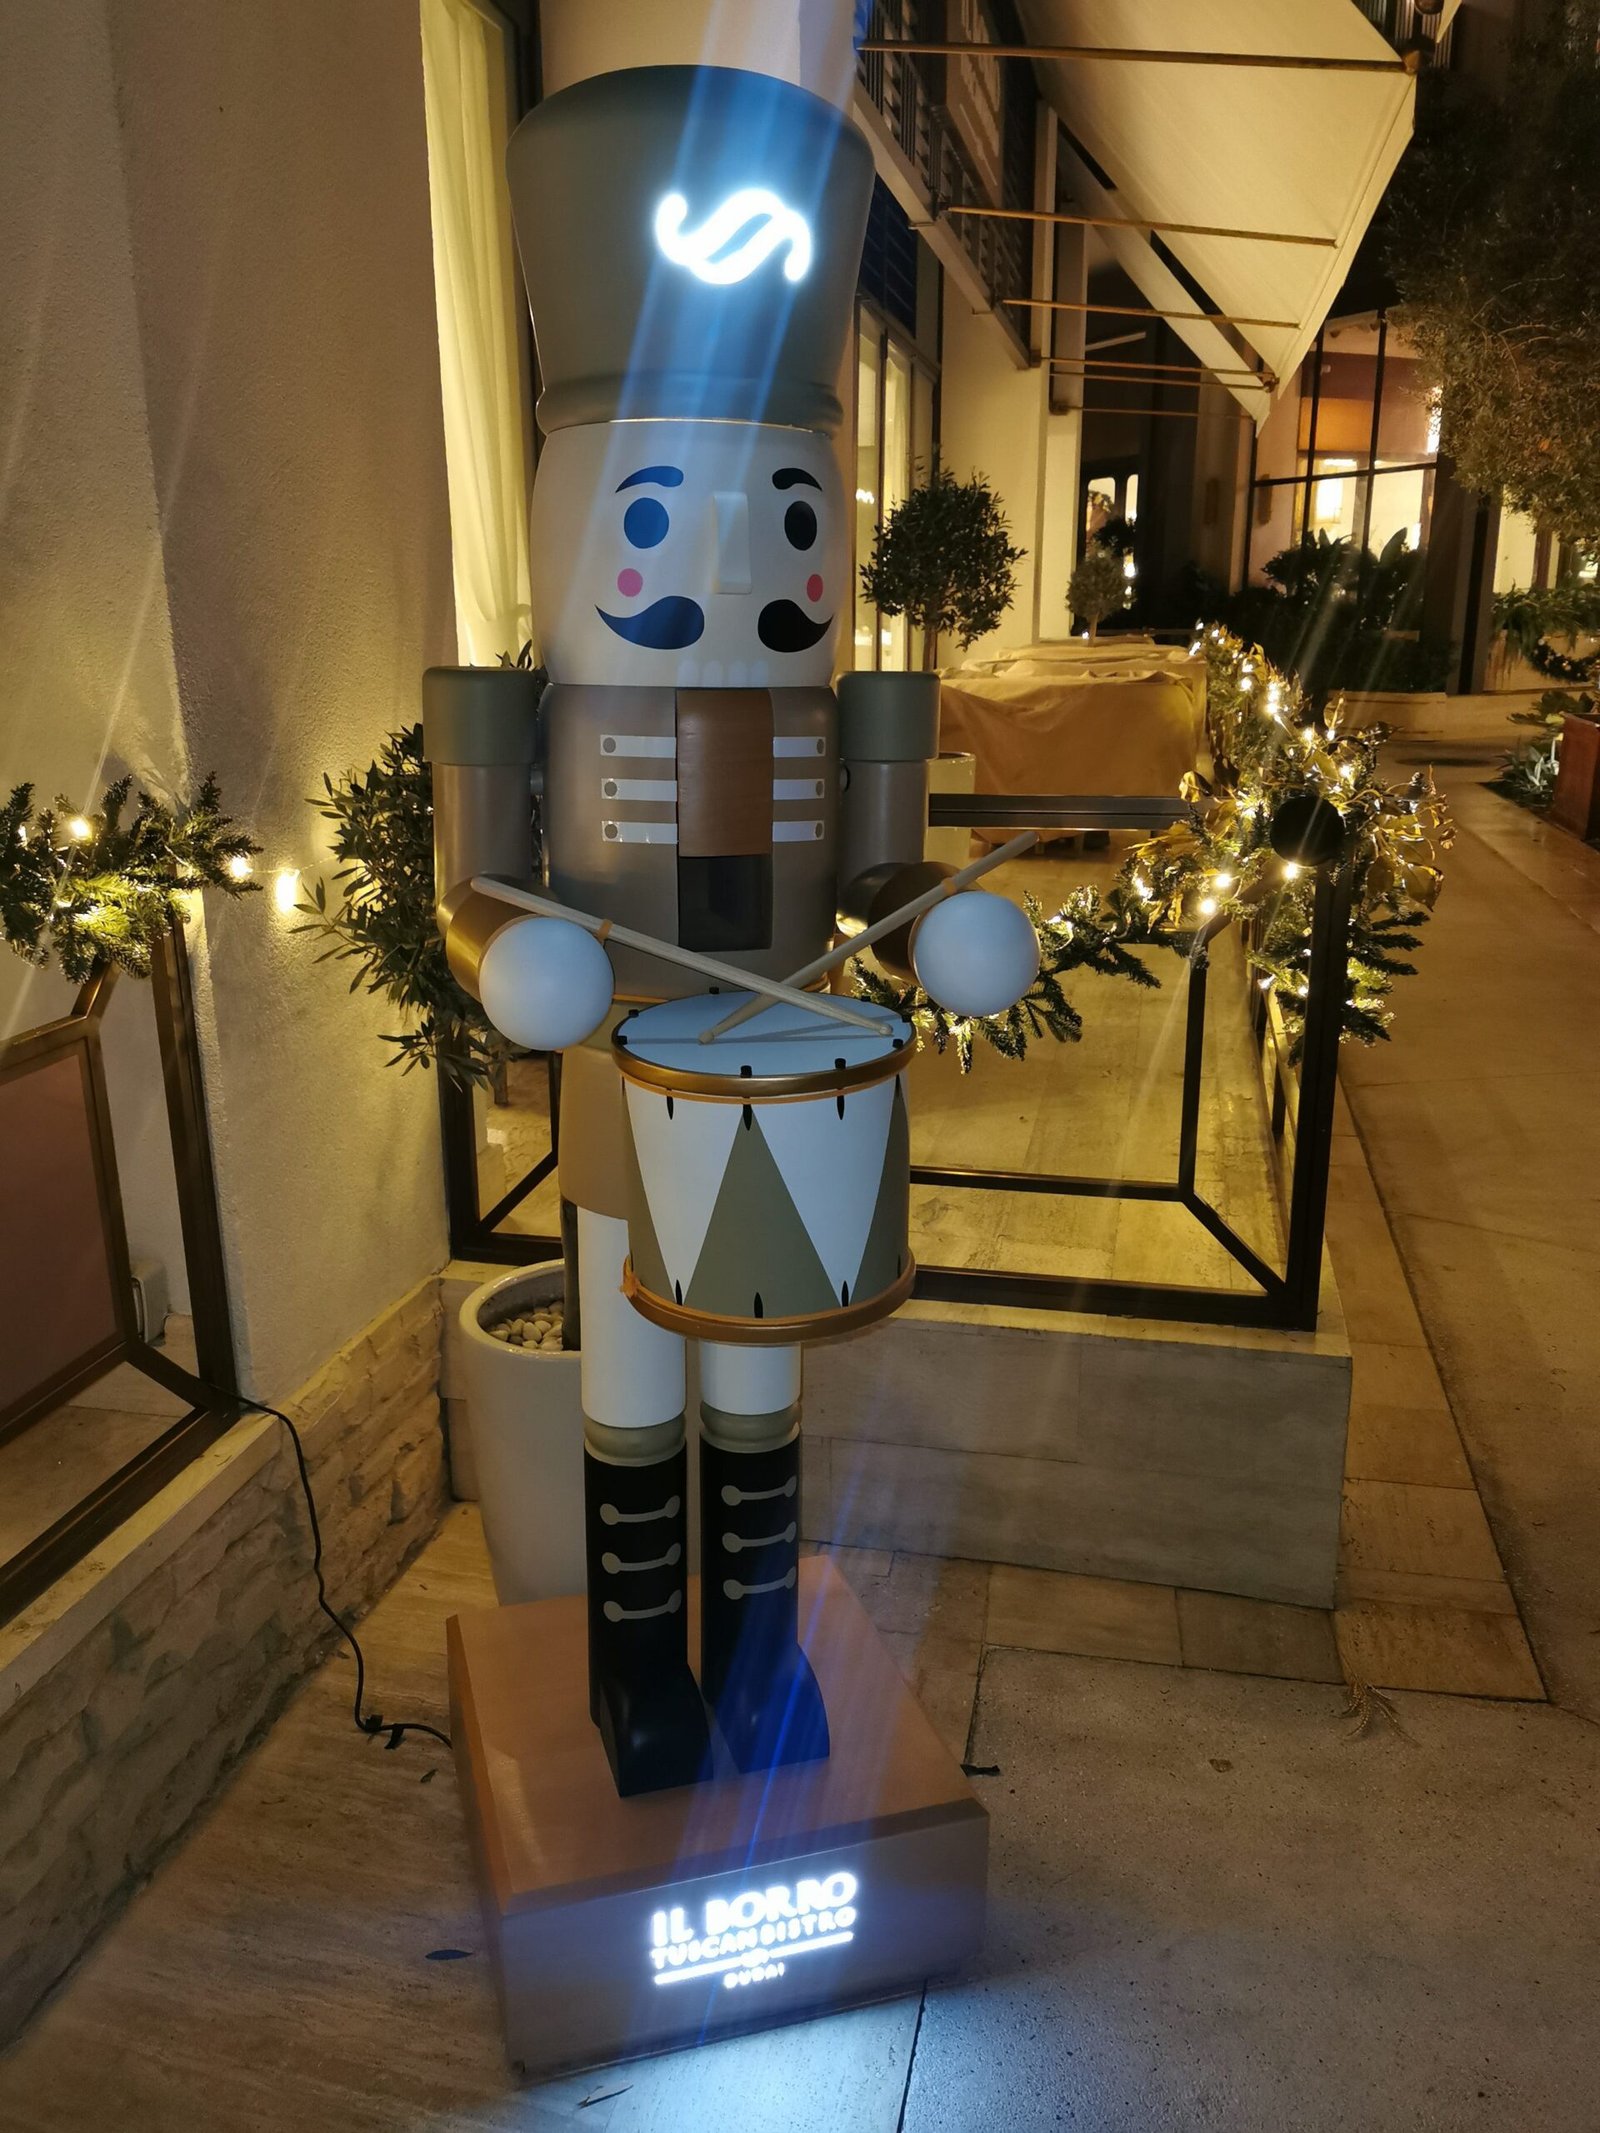
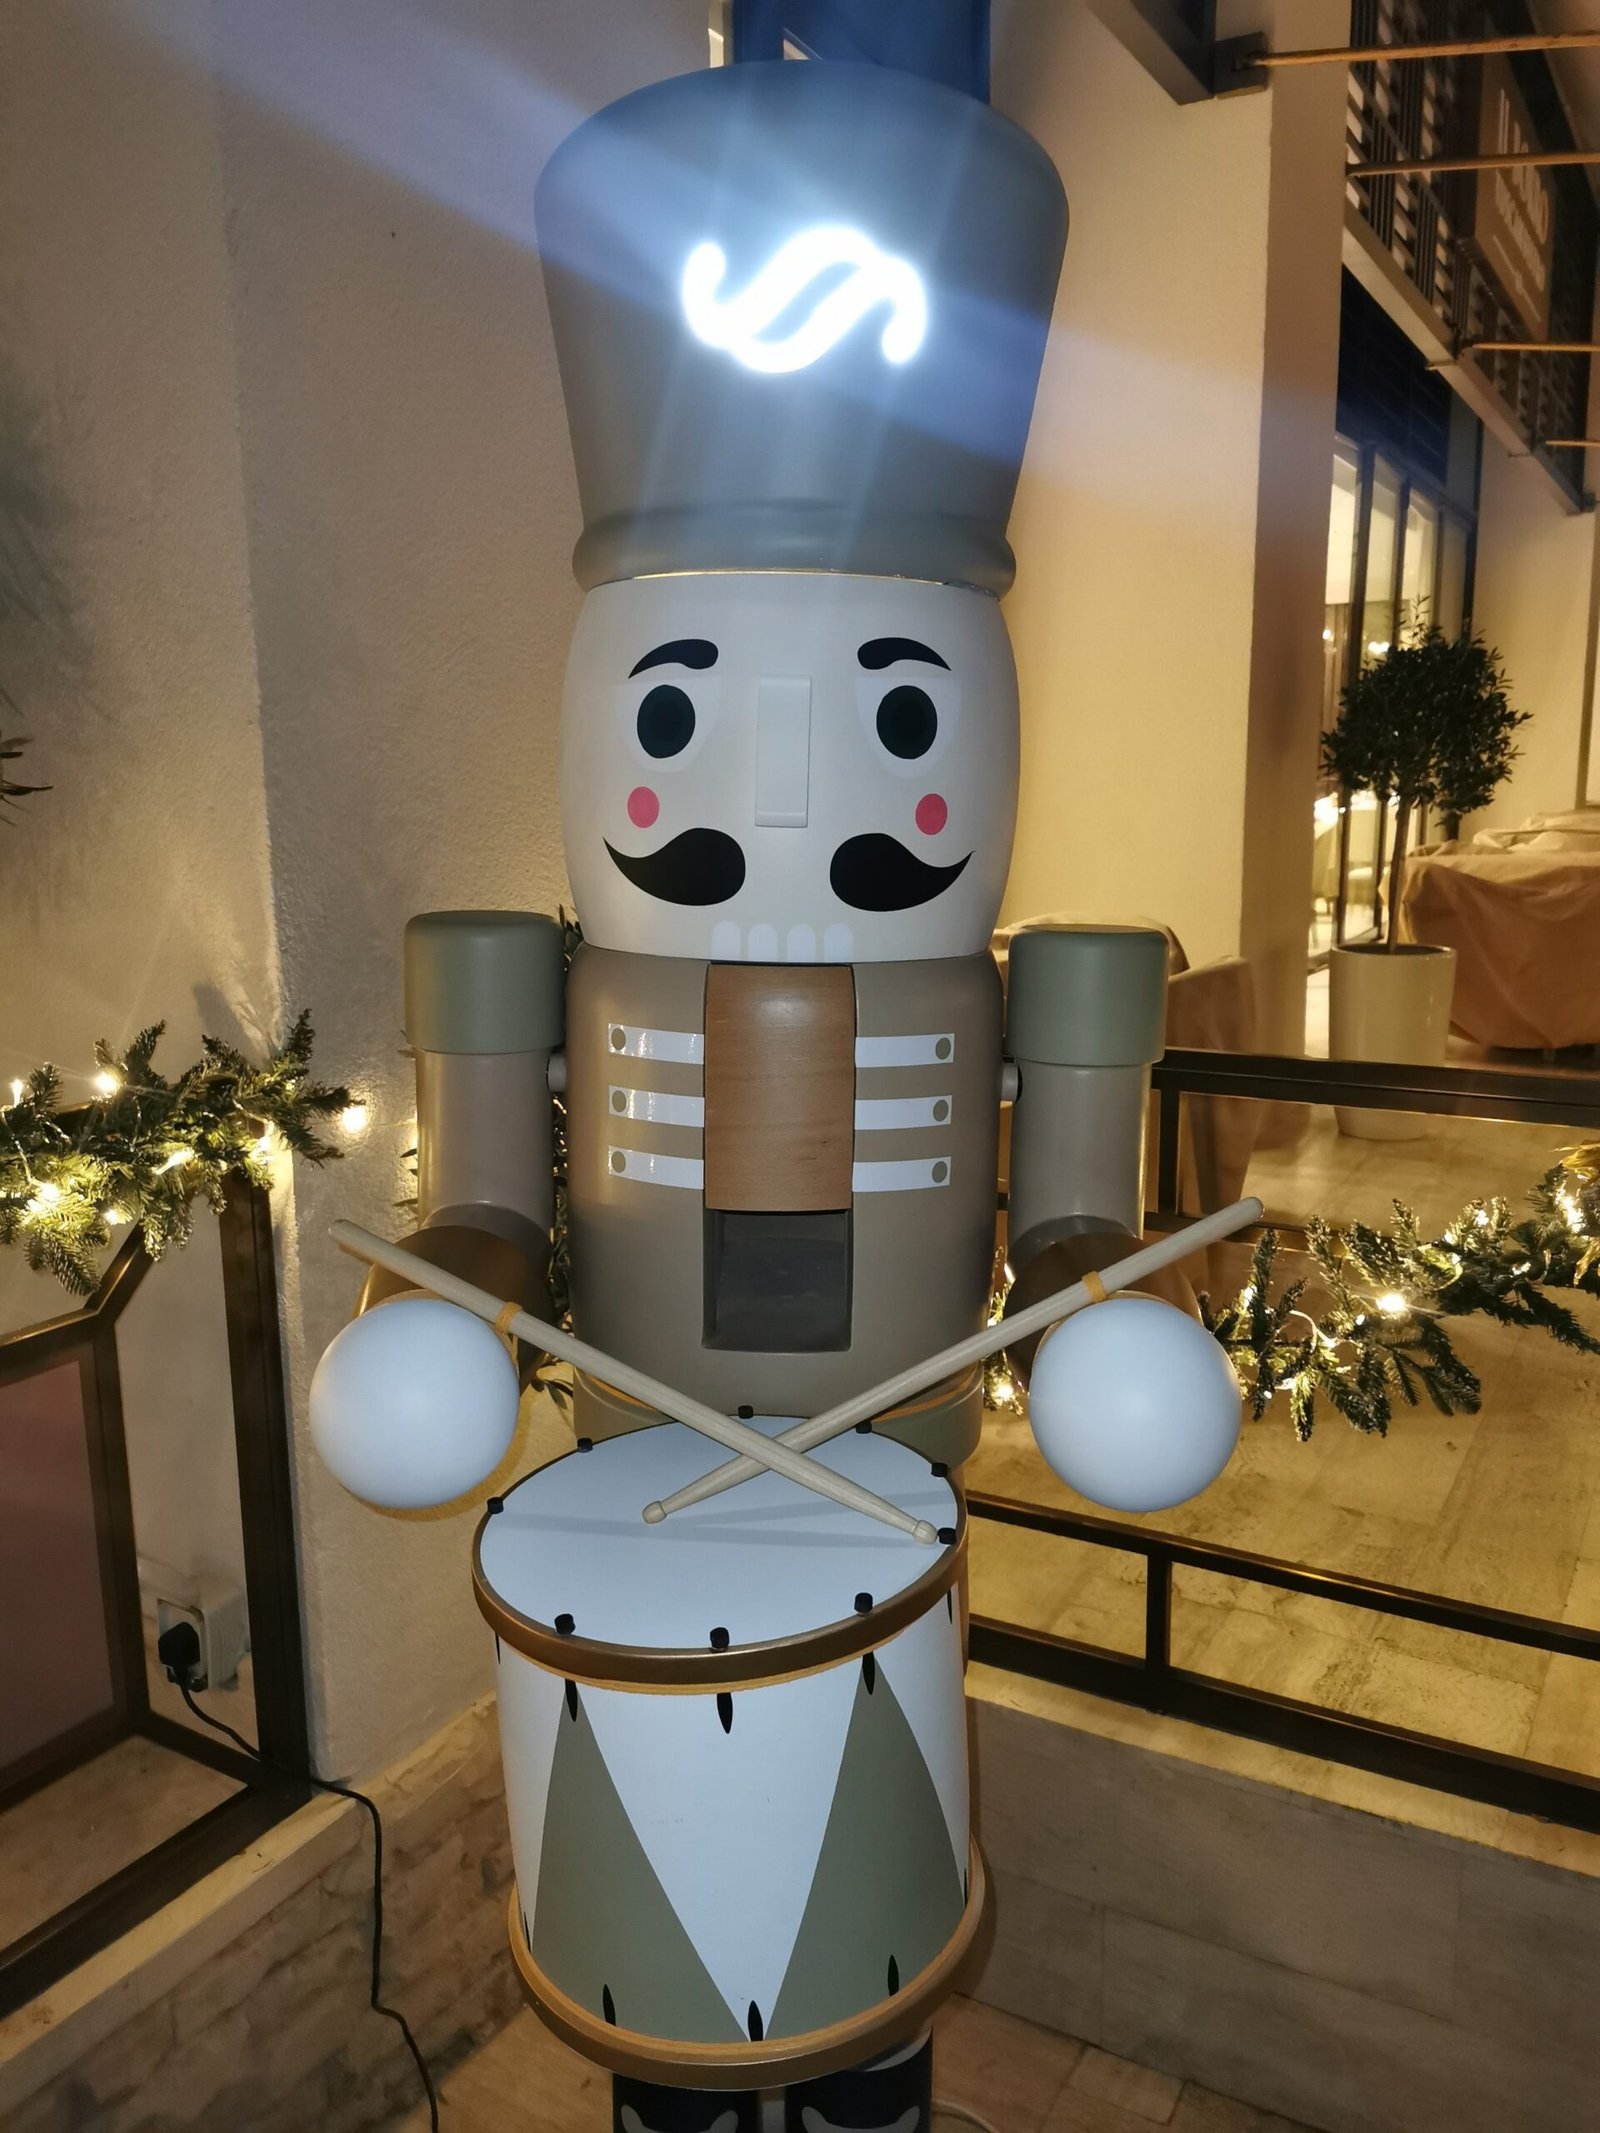

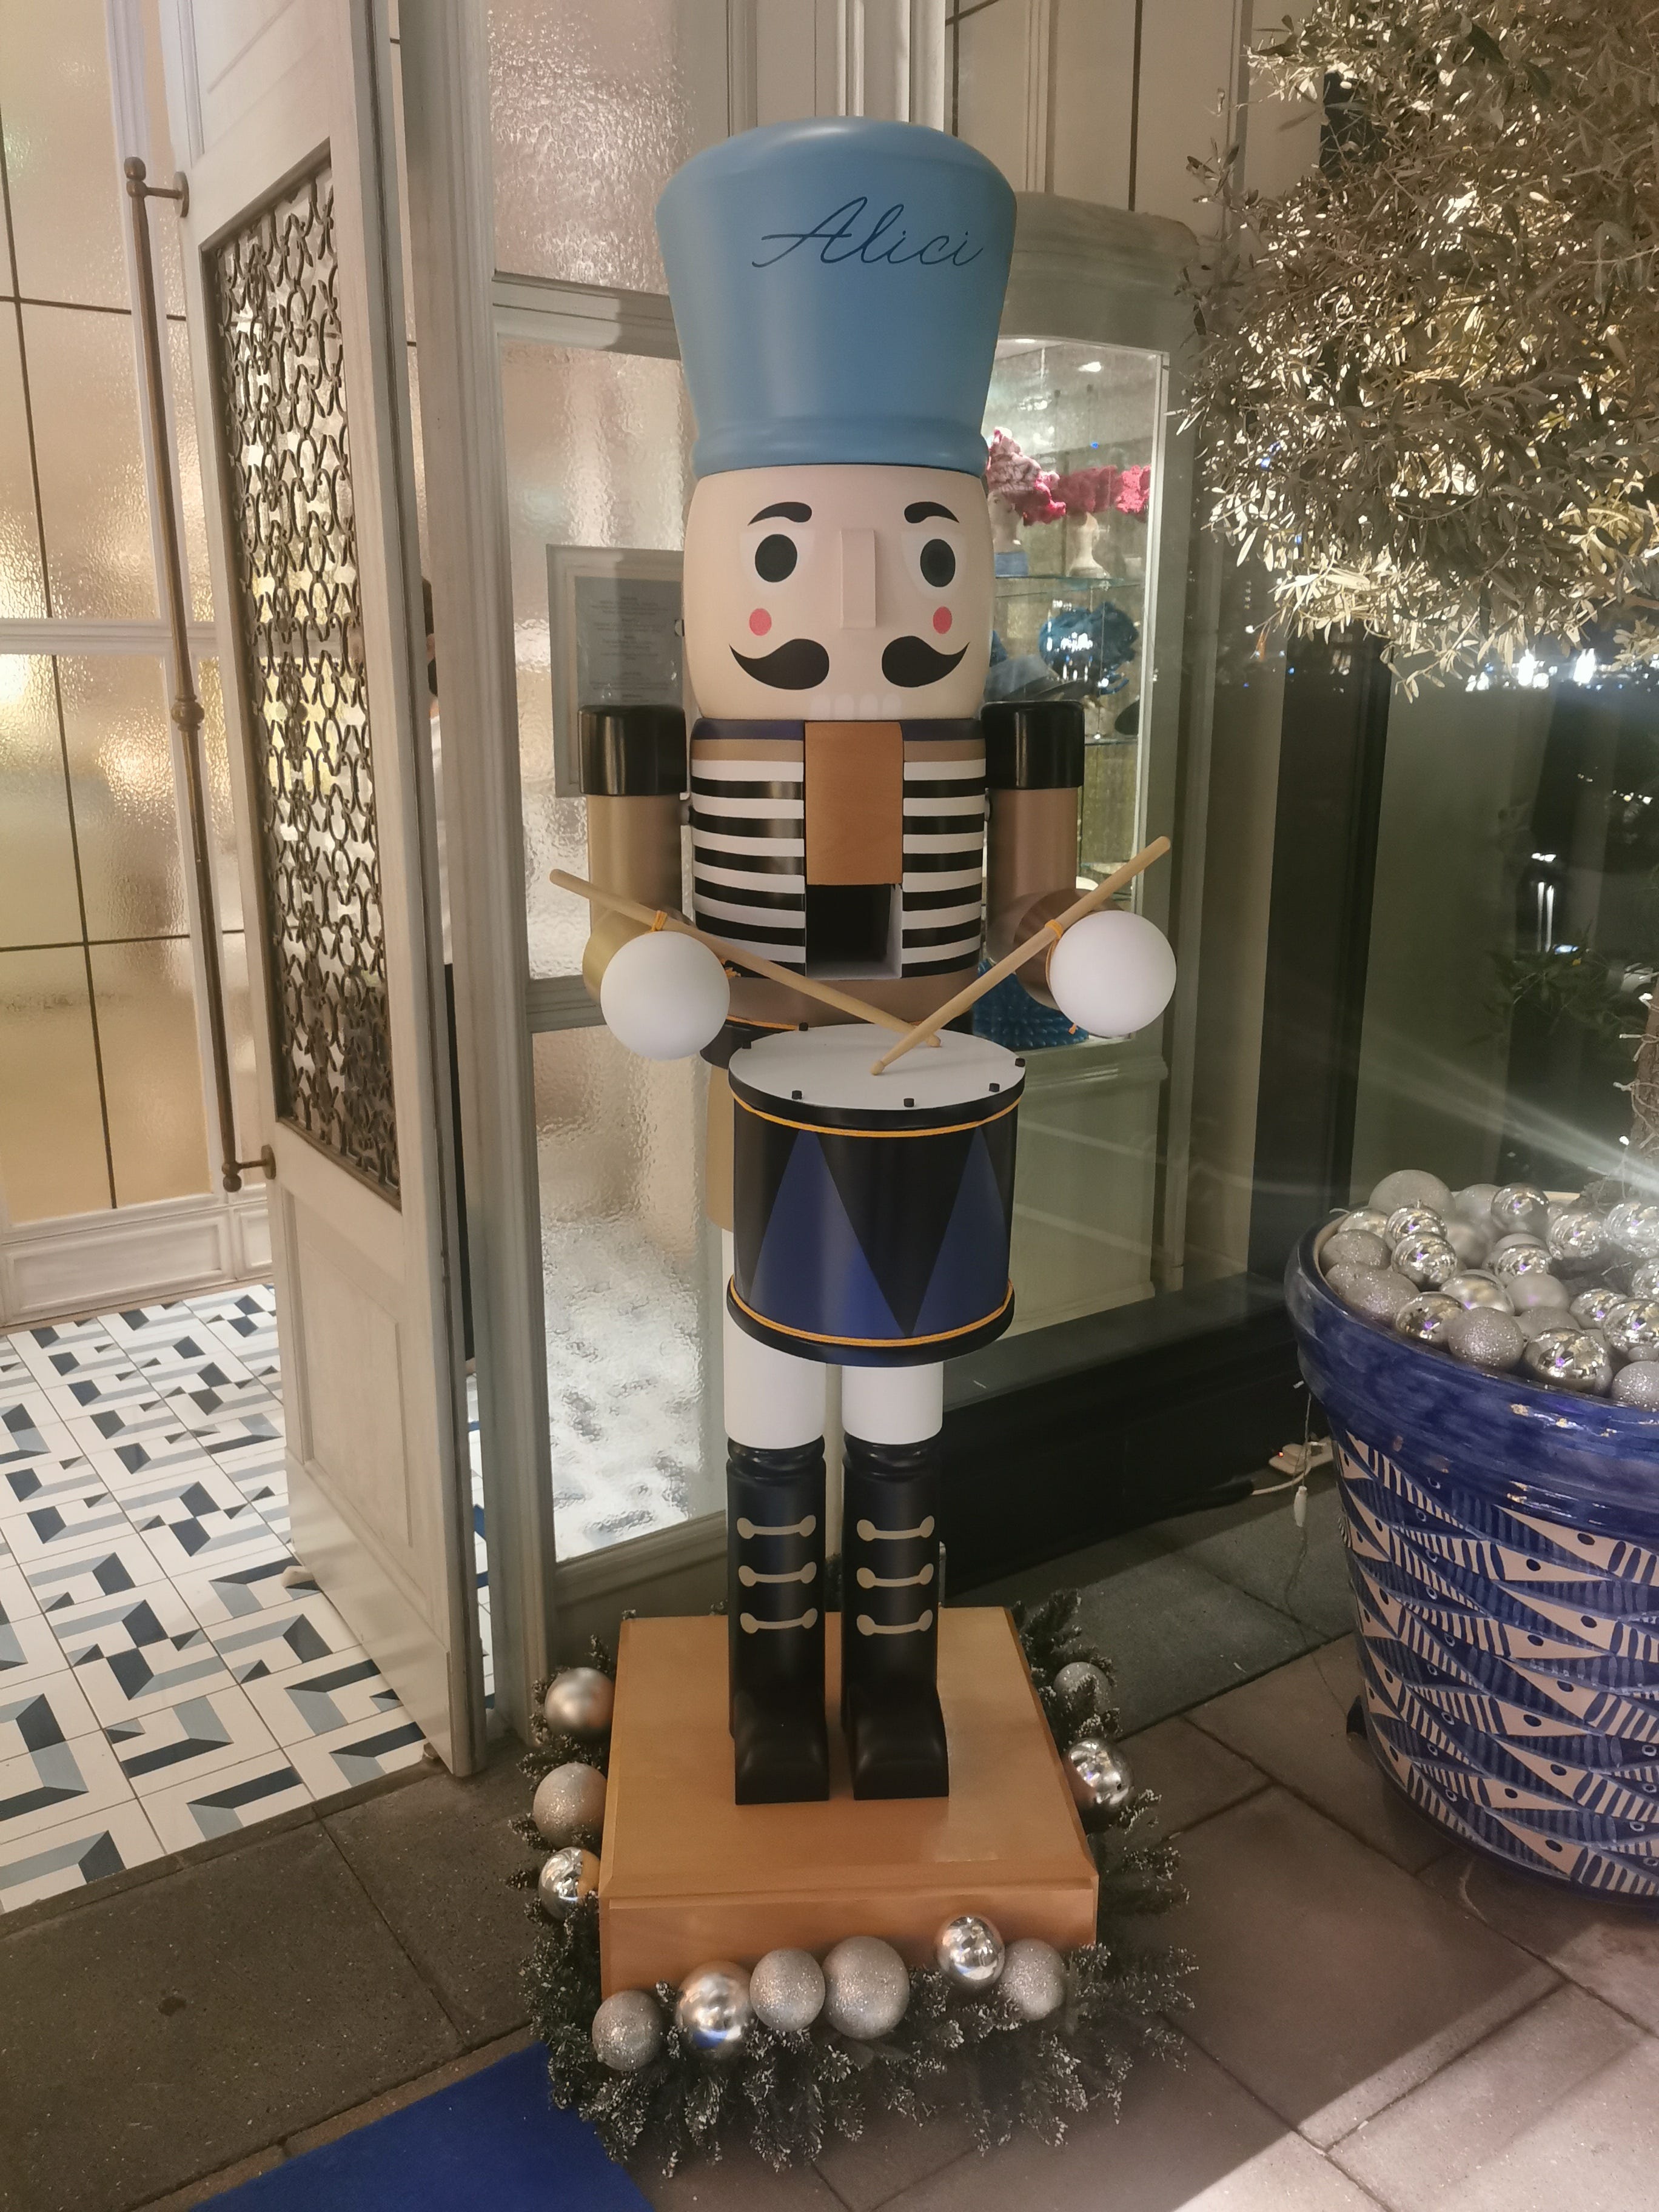
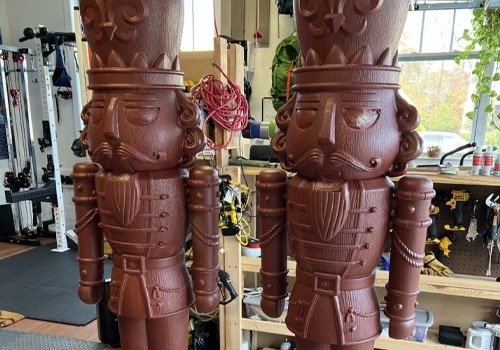
We delivered the items at 4 am. 2 nutcrackers had to be installed at 2 different locations. Here is how they look and it’s mind-blowing. This was one of the most challenging projects we did at Macoma Tech.
Thanks for reading and I hope you learned something from this article.
Keep Making!